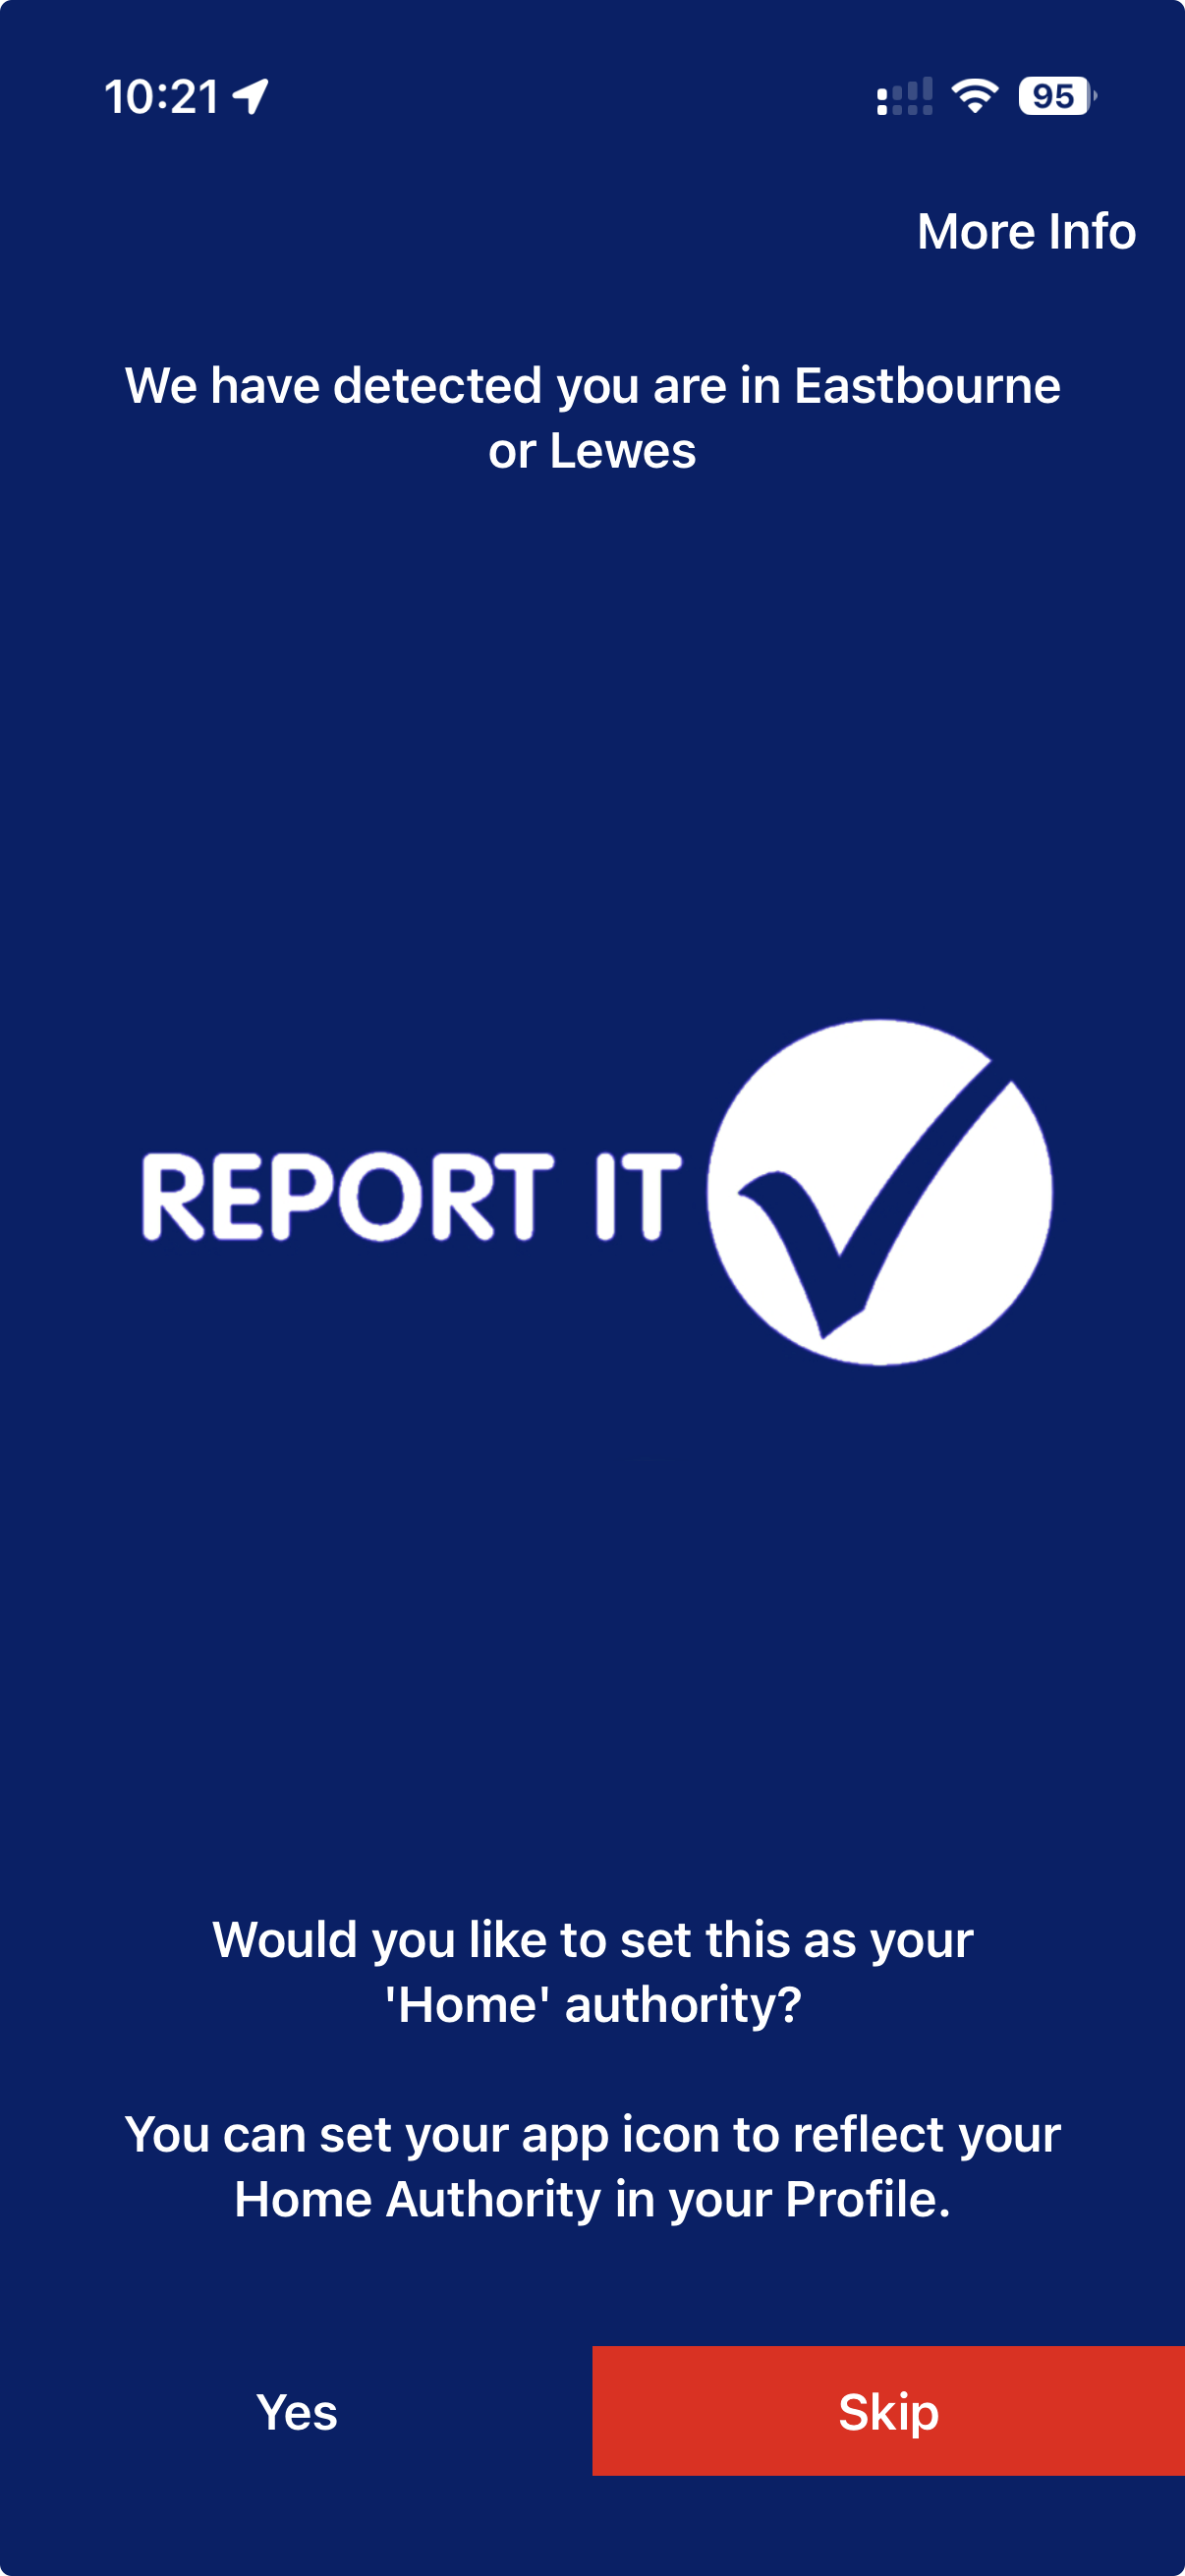
Follow the onboarding prompts and allow camera and location access. The app may offer to set the authority detected for your area as your home authority.
Set your home authorityYou can change it later in Profile → App settings.
Create a new report
Five steps from location to submission.
1
Set the exact report location
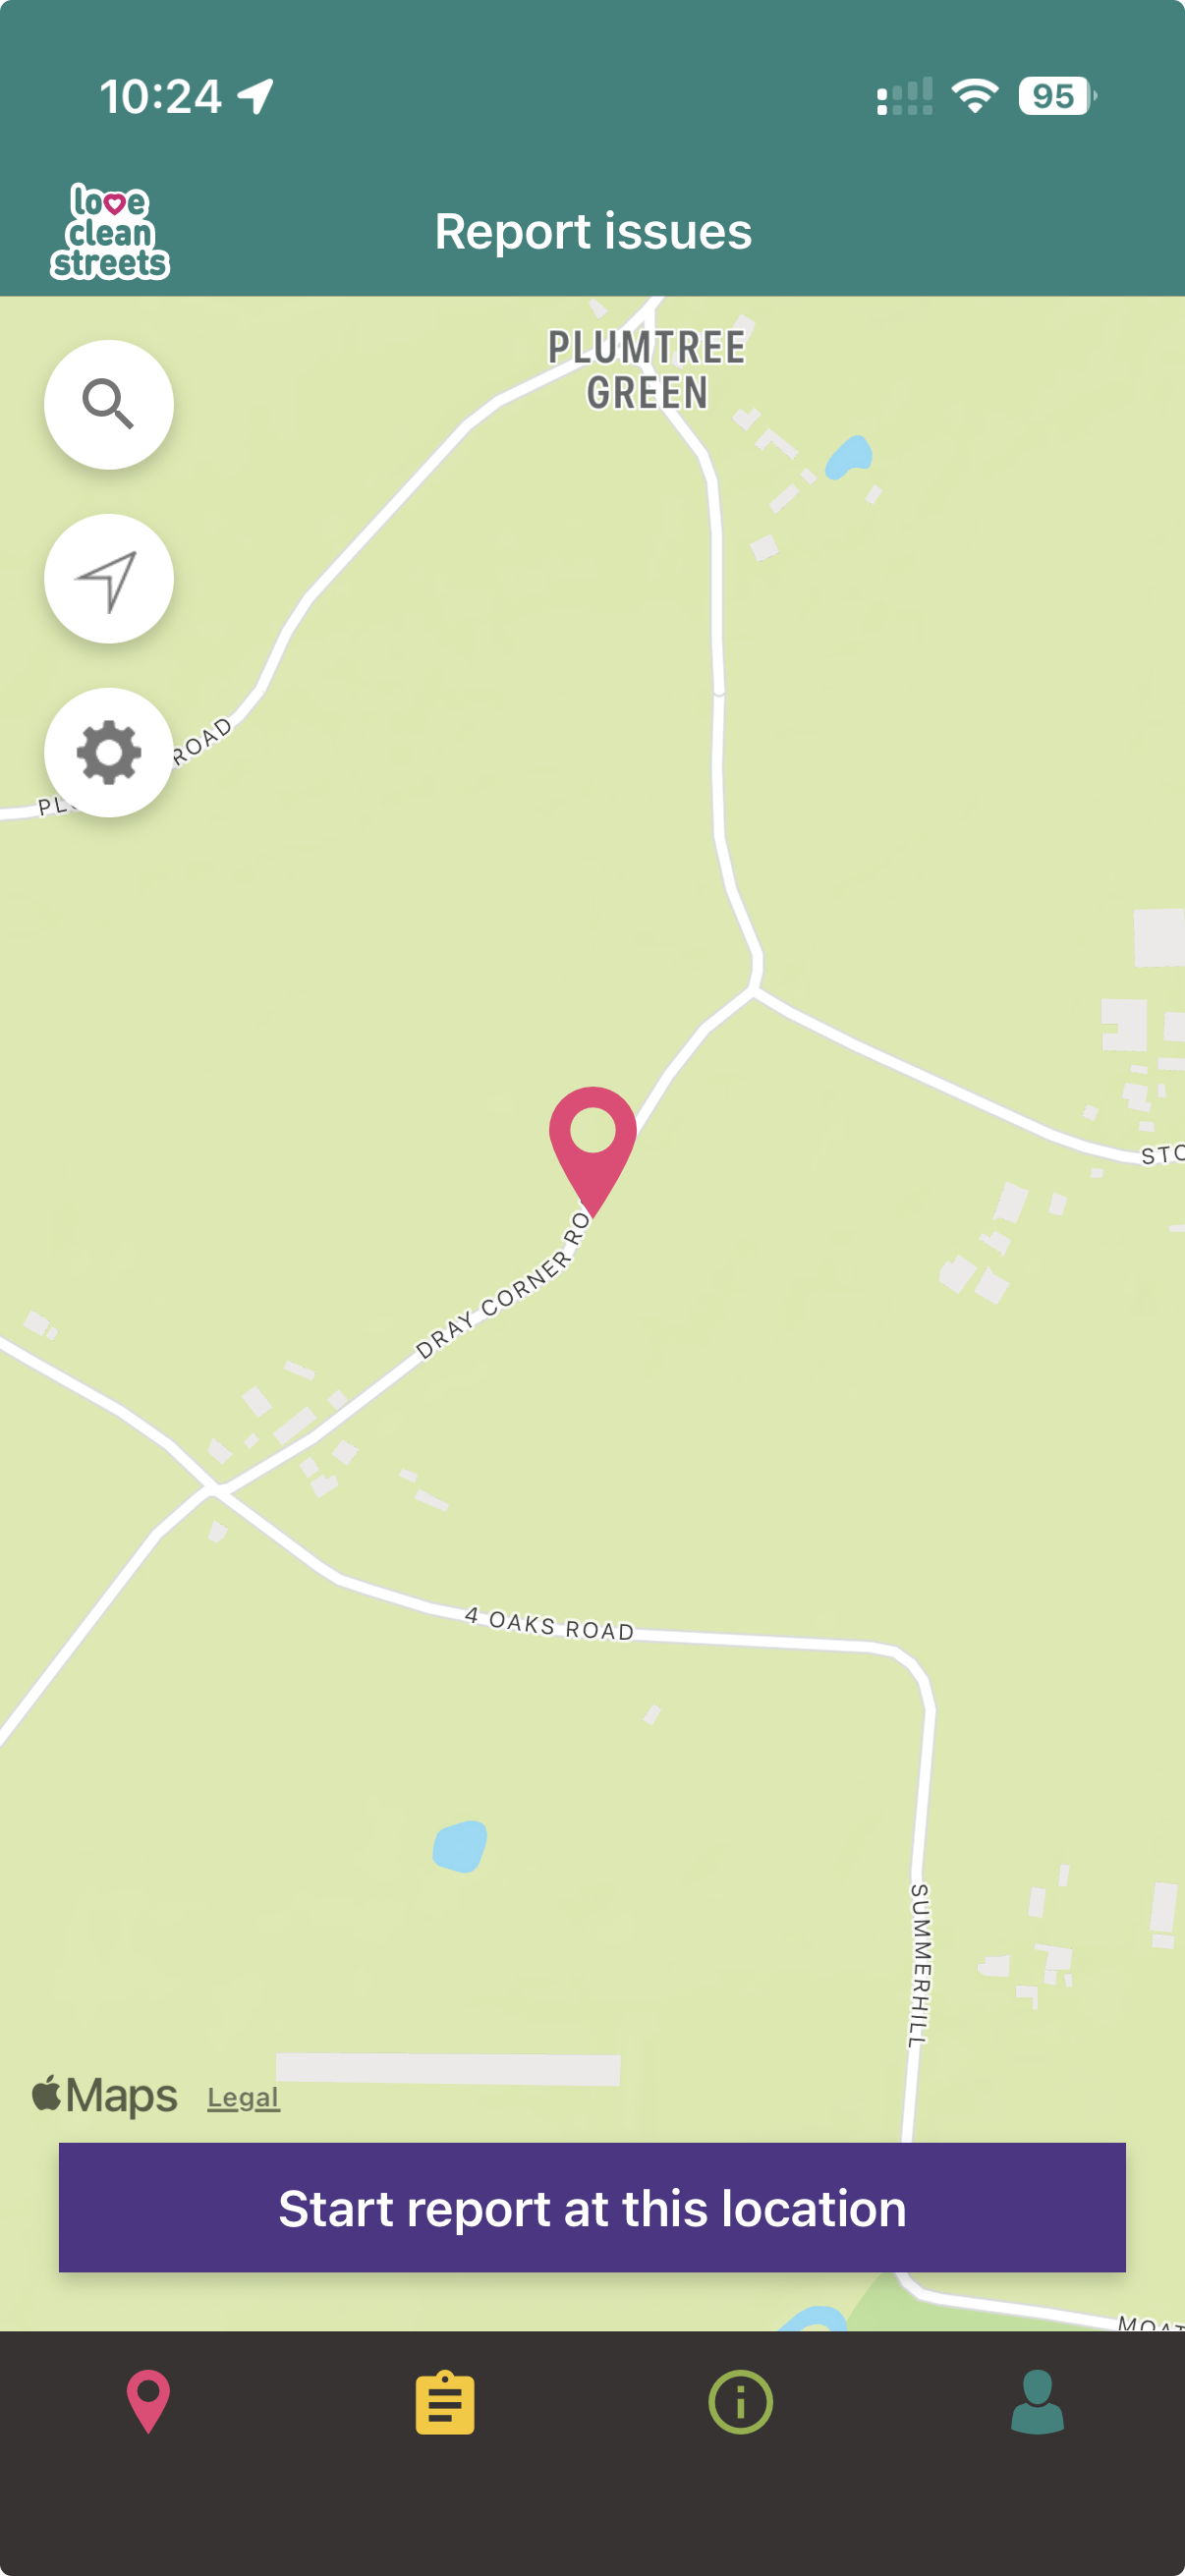
Start a report, allow location access if prompted, then move the map pin onto the issue itself. If the issue is somewhere else, use the search button to find its address or postcode. Check the displayed street, landmark or postcode.
Choose the locationSearch for an address when the issue is not at your current location.
2
Add and review a clear photo
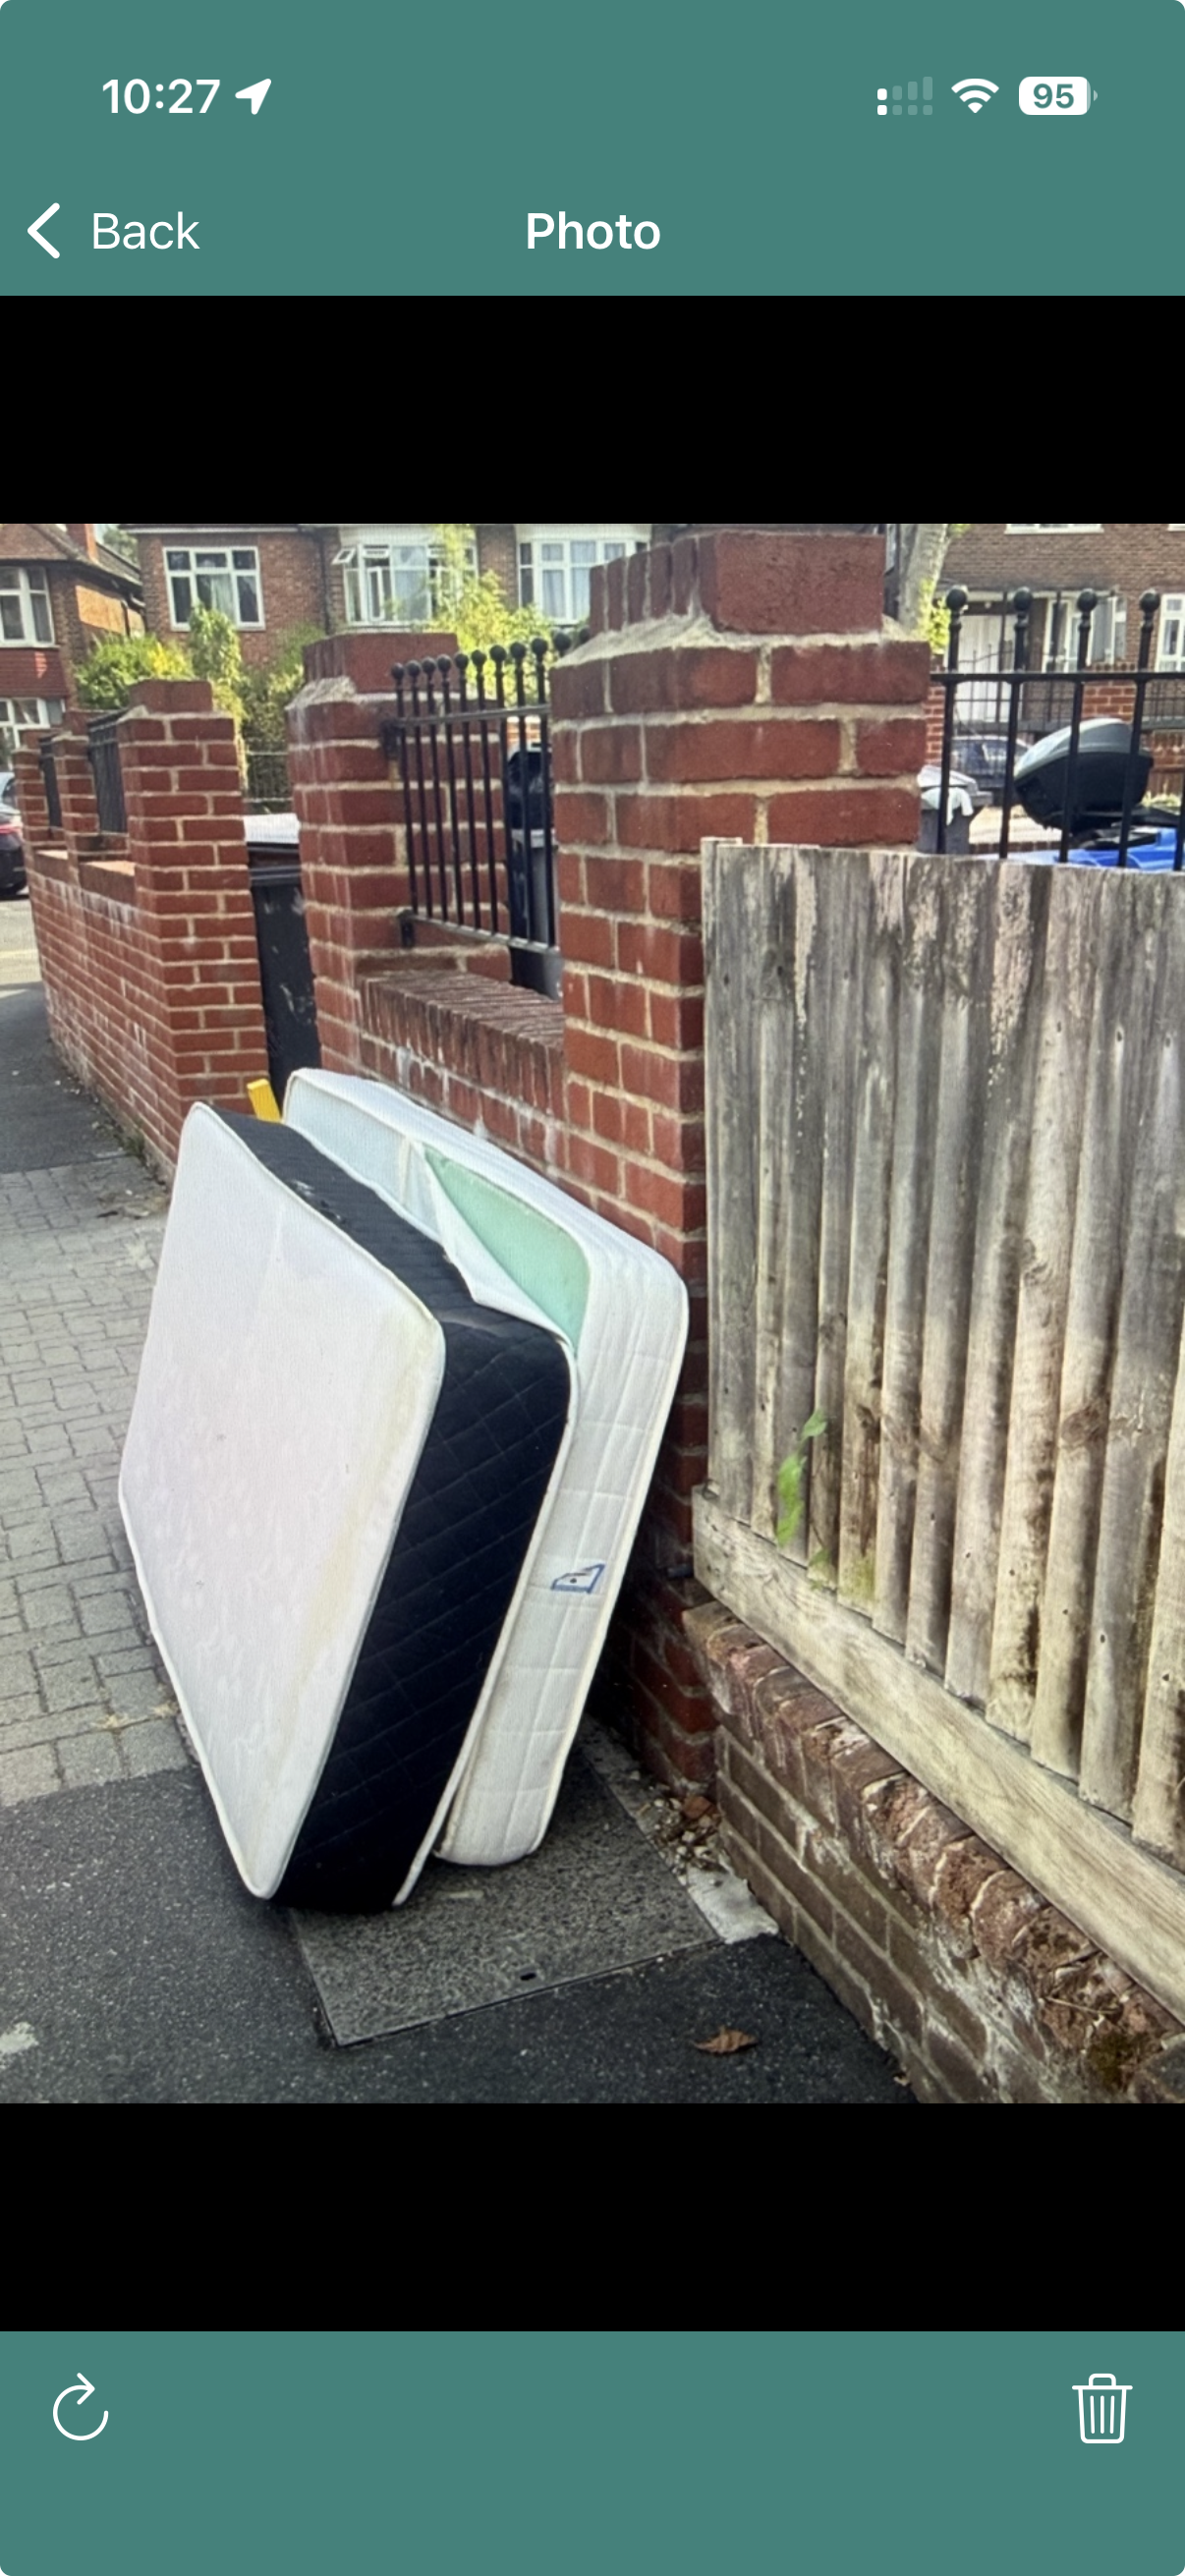
Photograph the issue safely, then check the image. A clear photo helps the receiving organisation understand the type, size and surroundings.
Check the photoRetake or delete an unclear image.
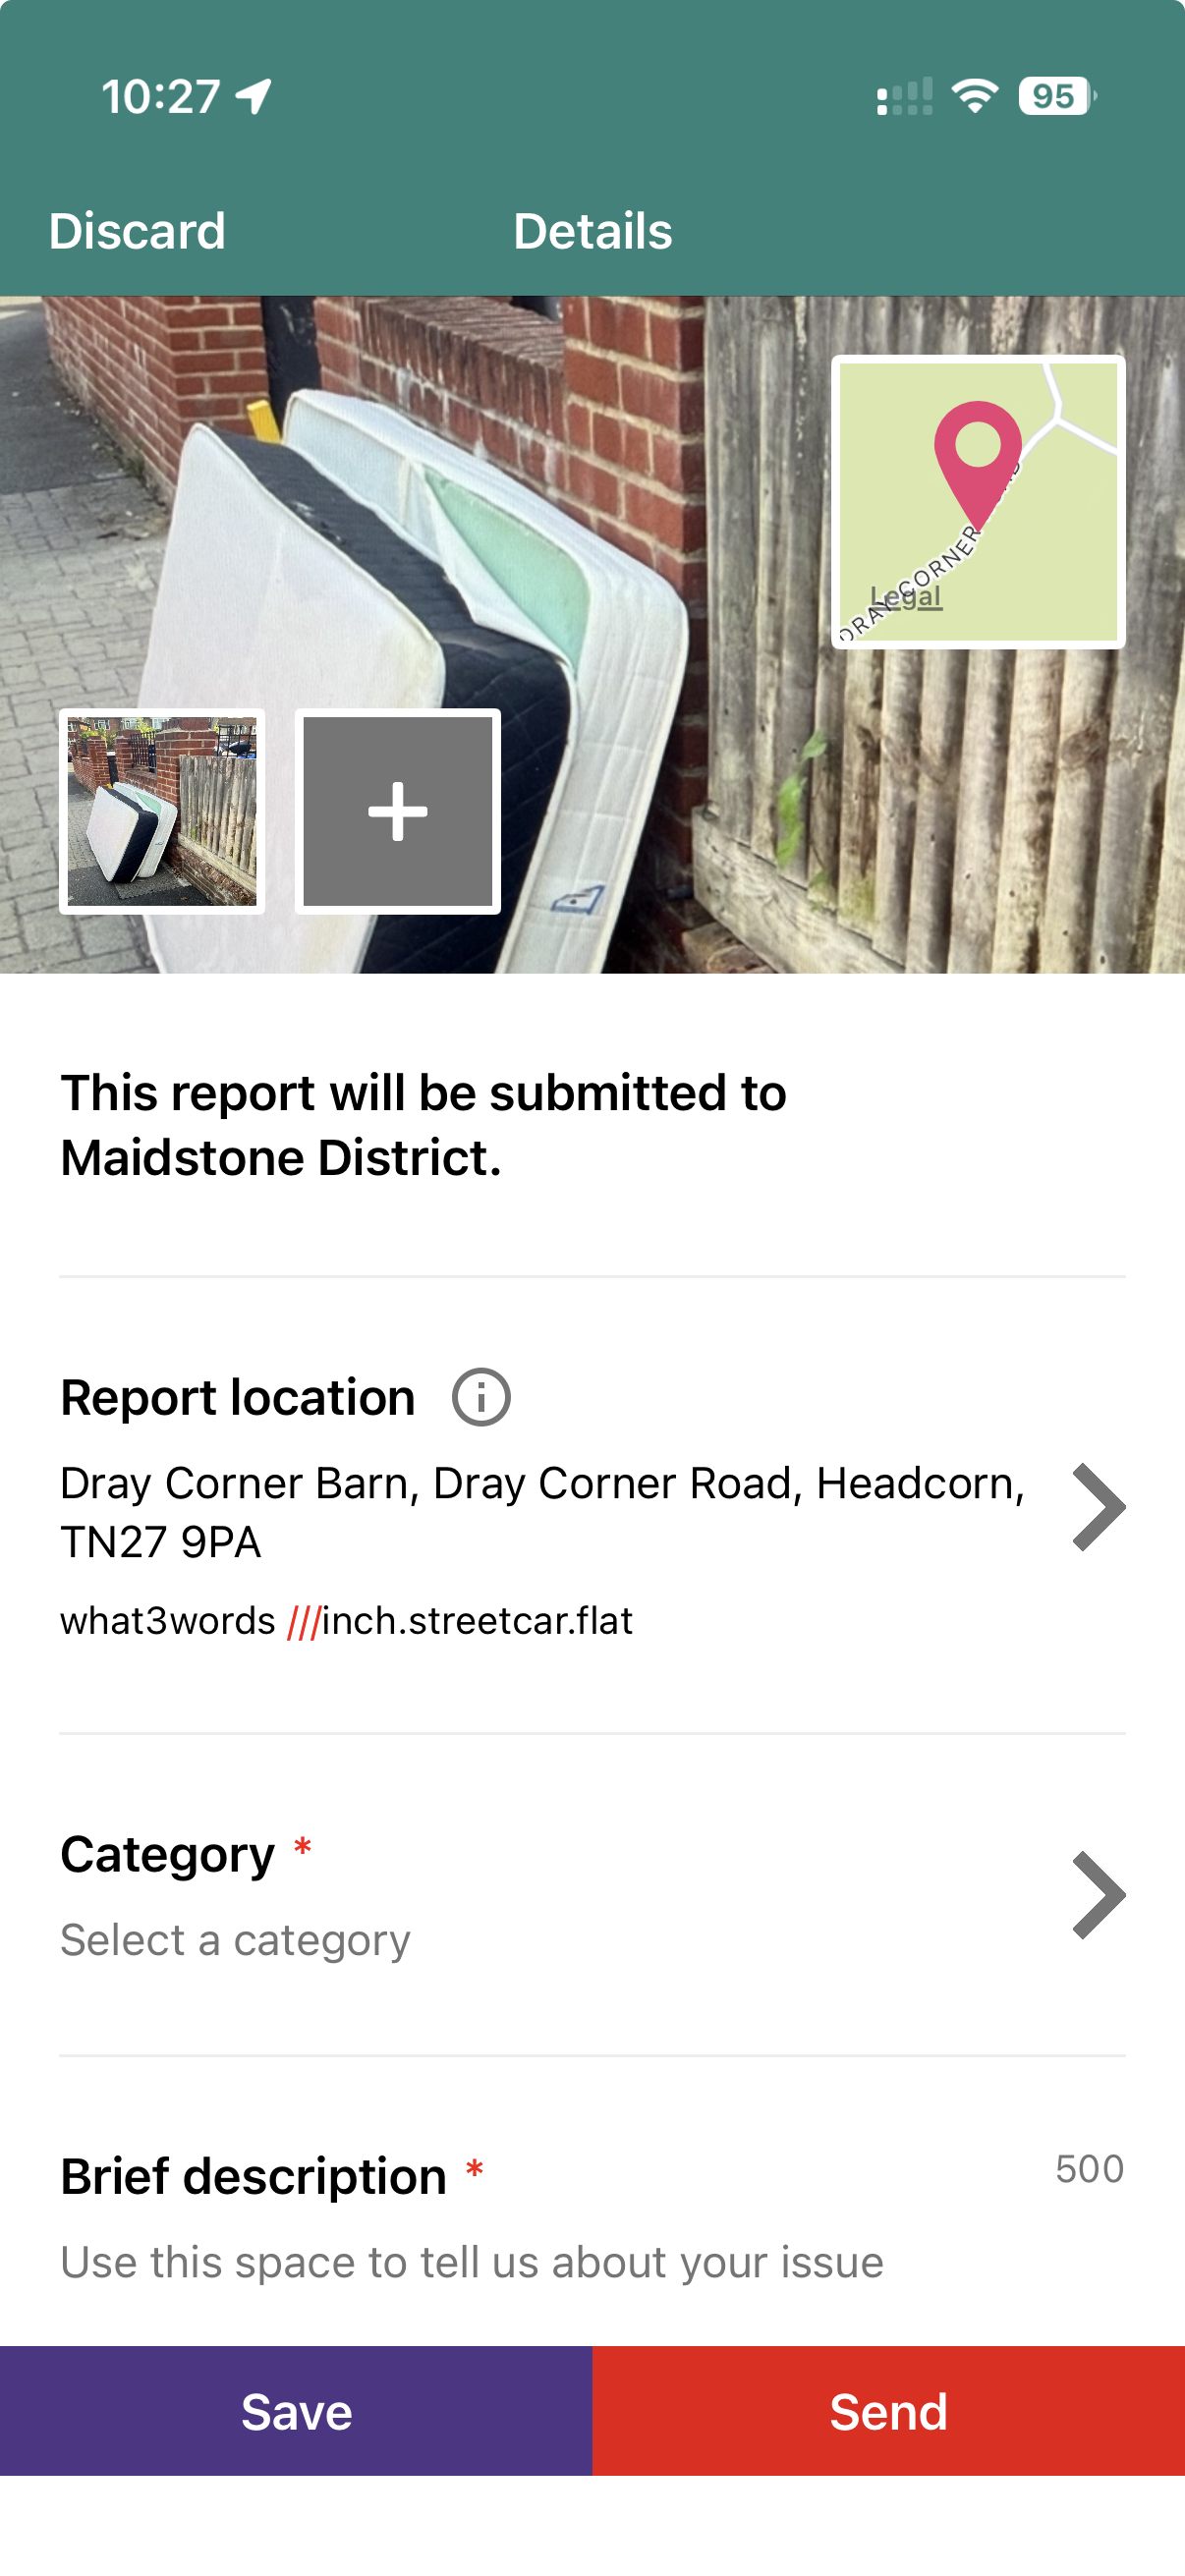
Review the reportAdd another image if it helps explain the issue.
3
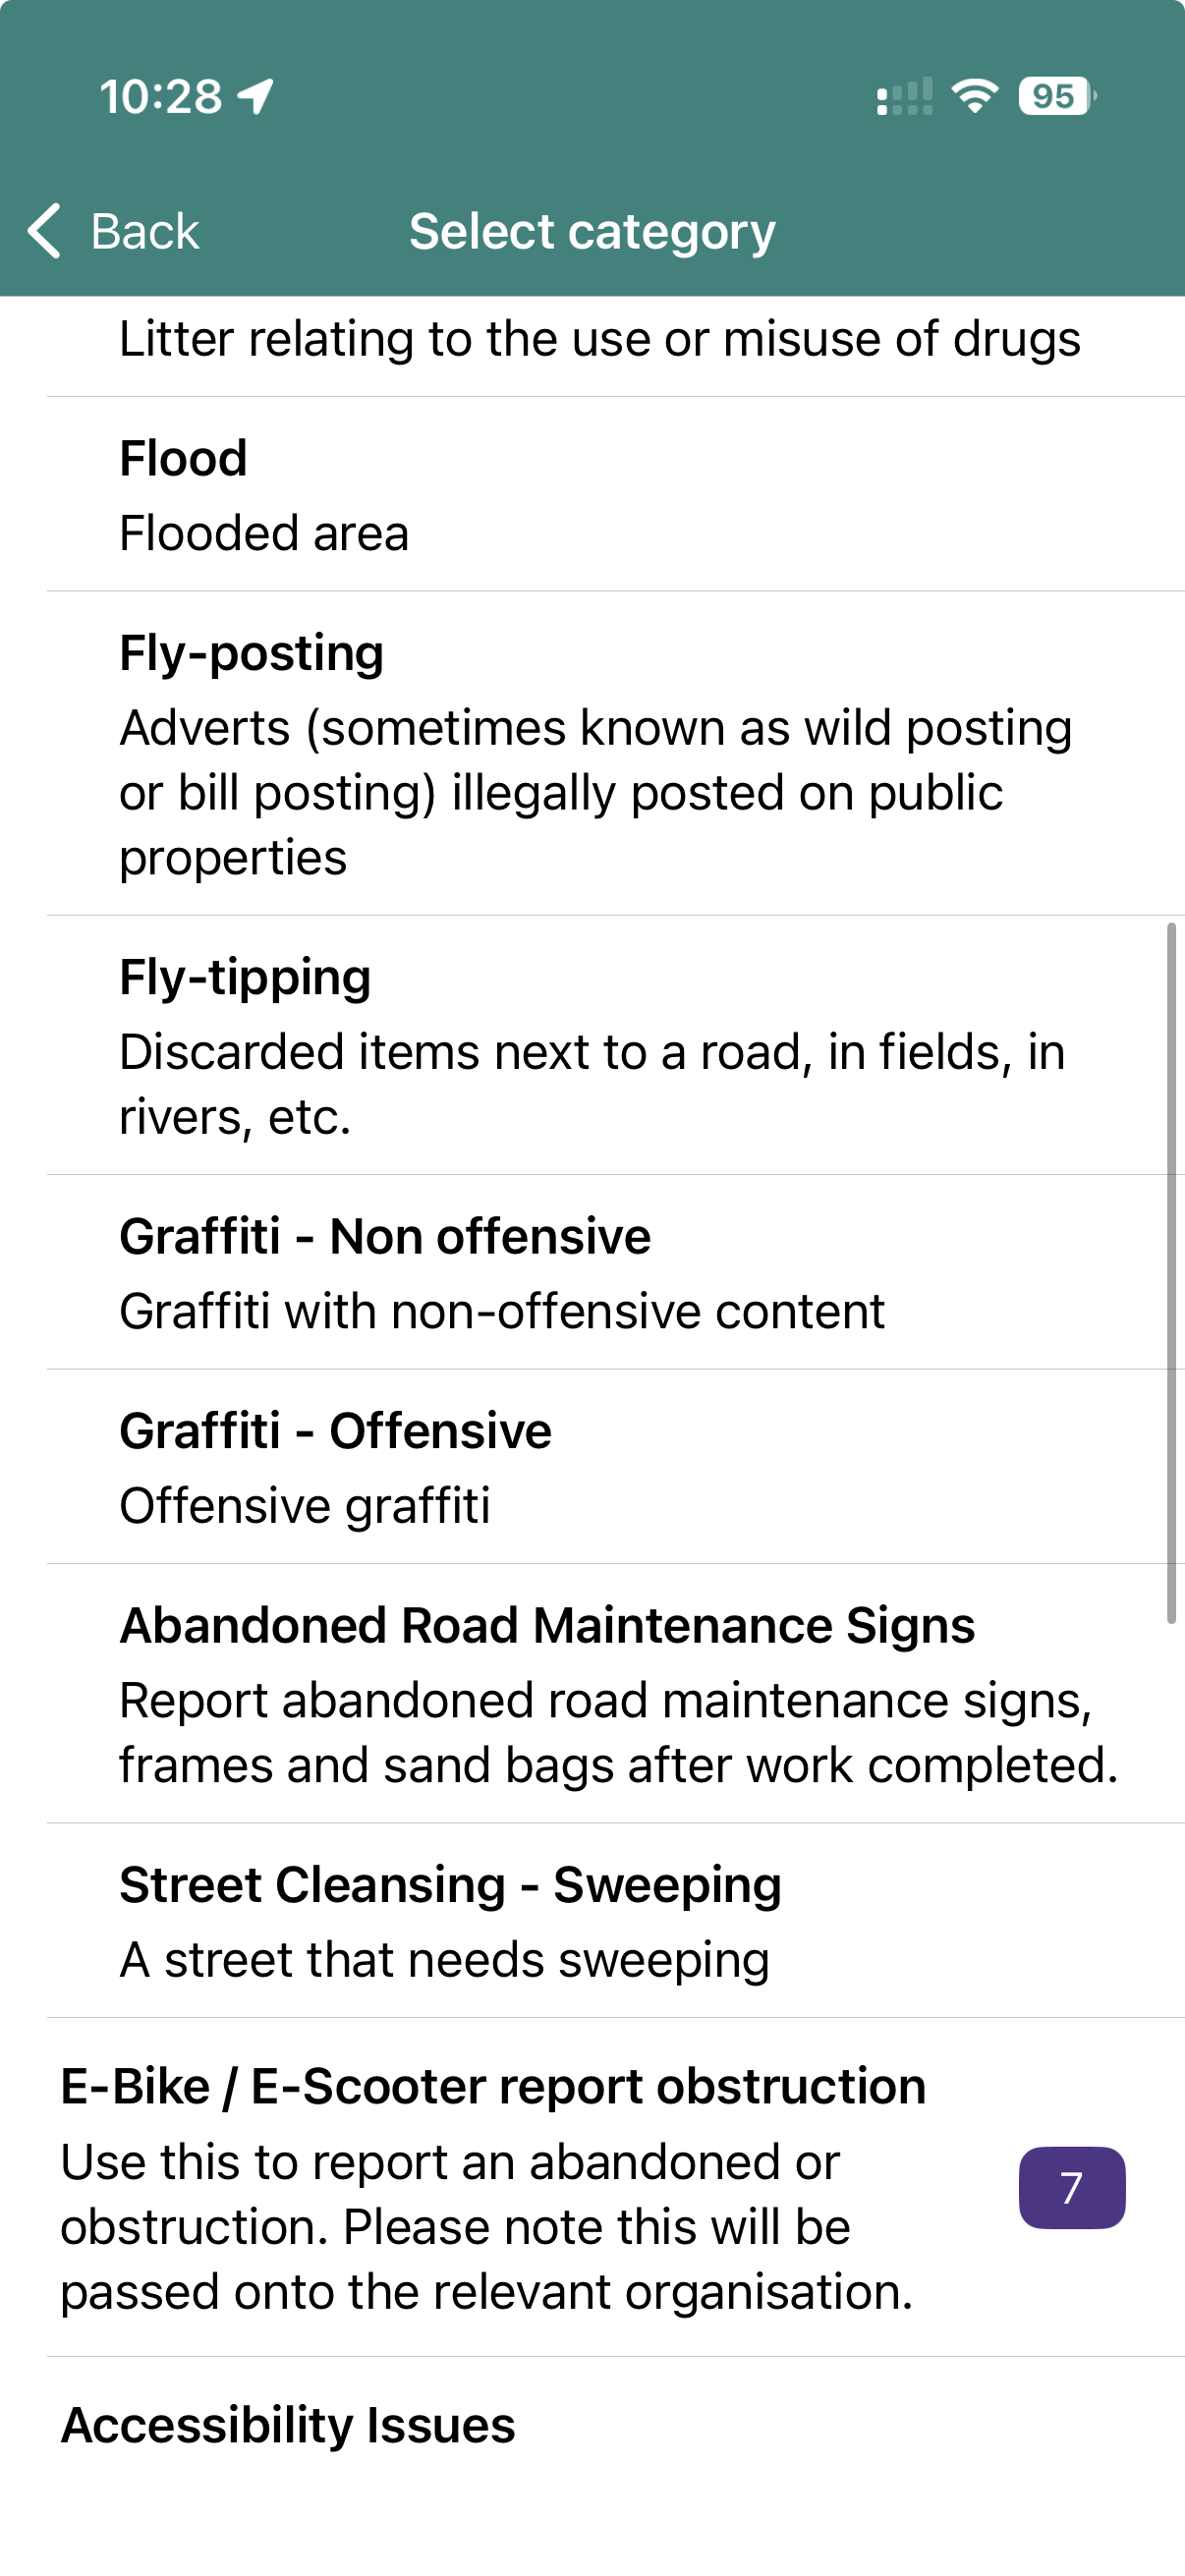
Choose a category
Choose the closest available category. The categories offered are based on the report location and can change when the pin moves.
Choose the closest categoryThe categories shown are determined by the location on the map.
4
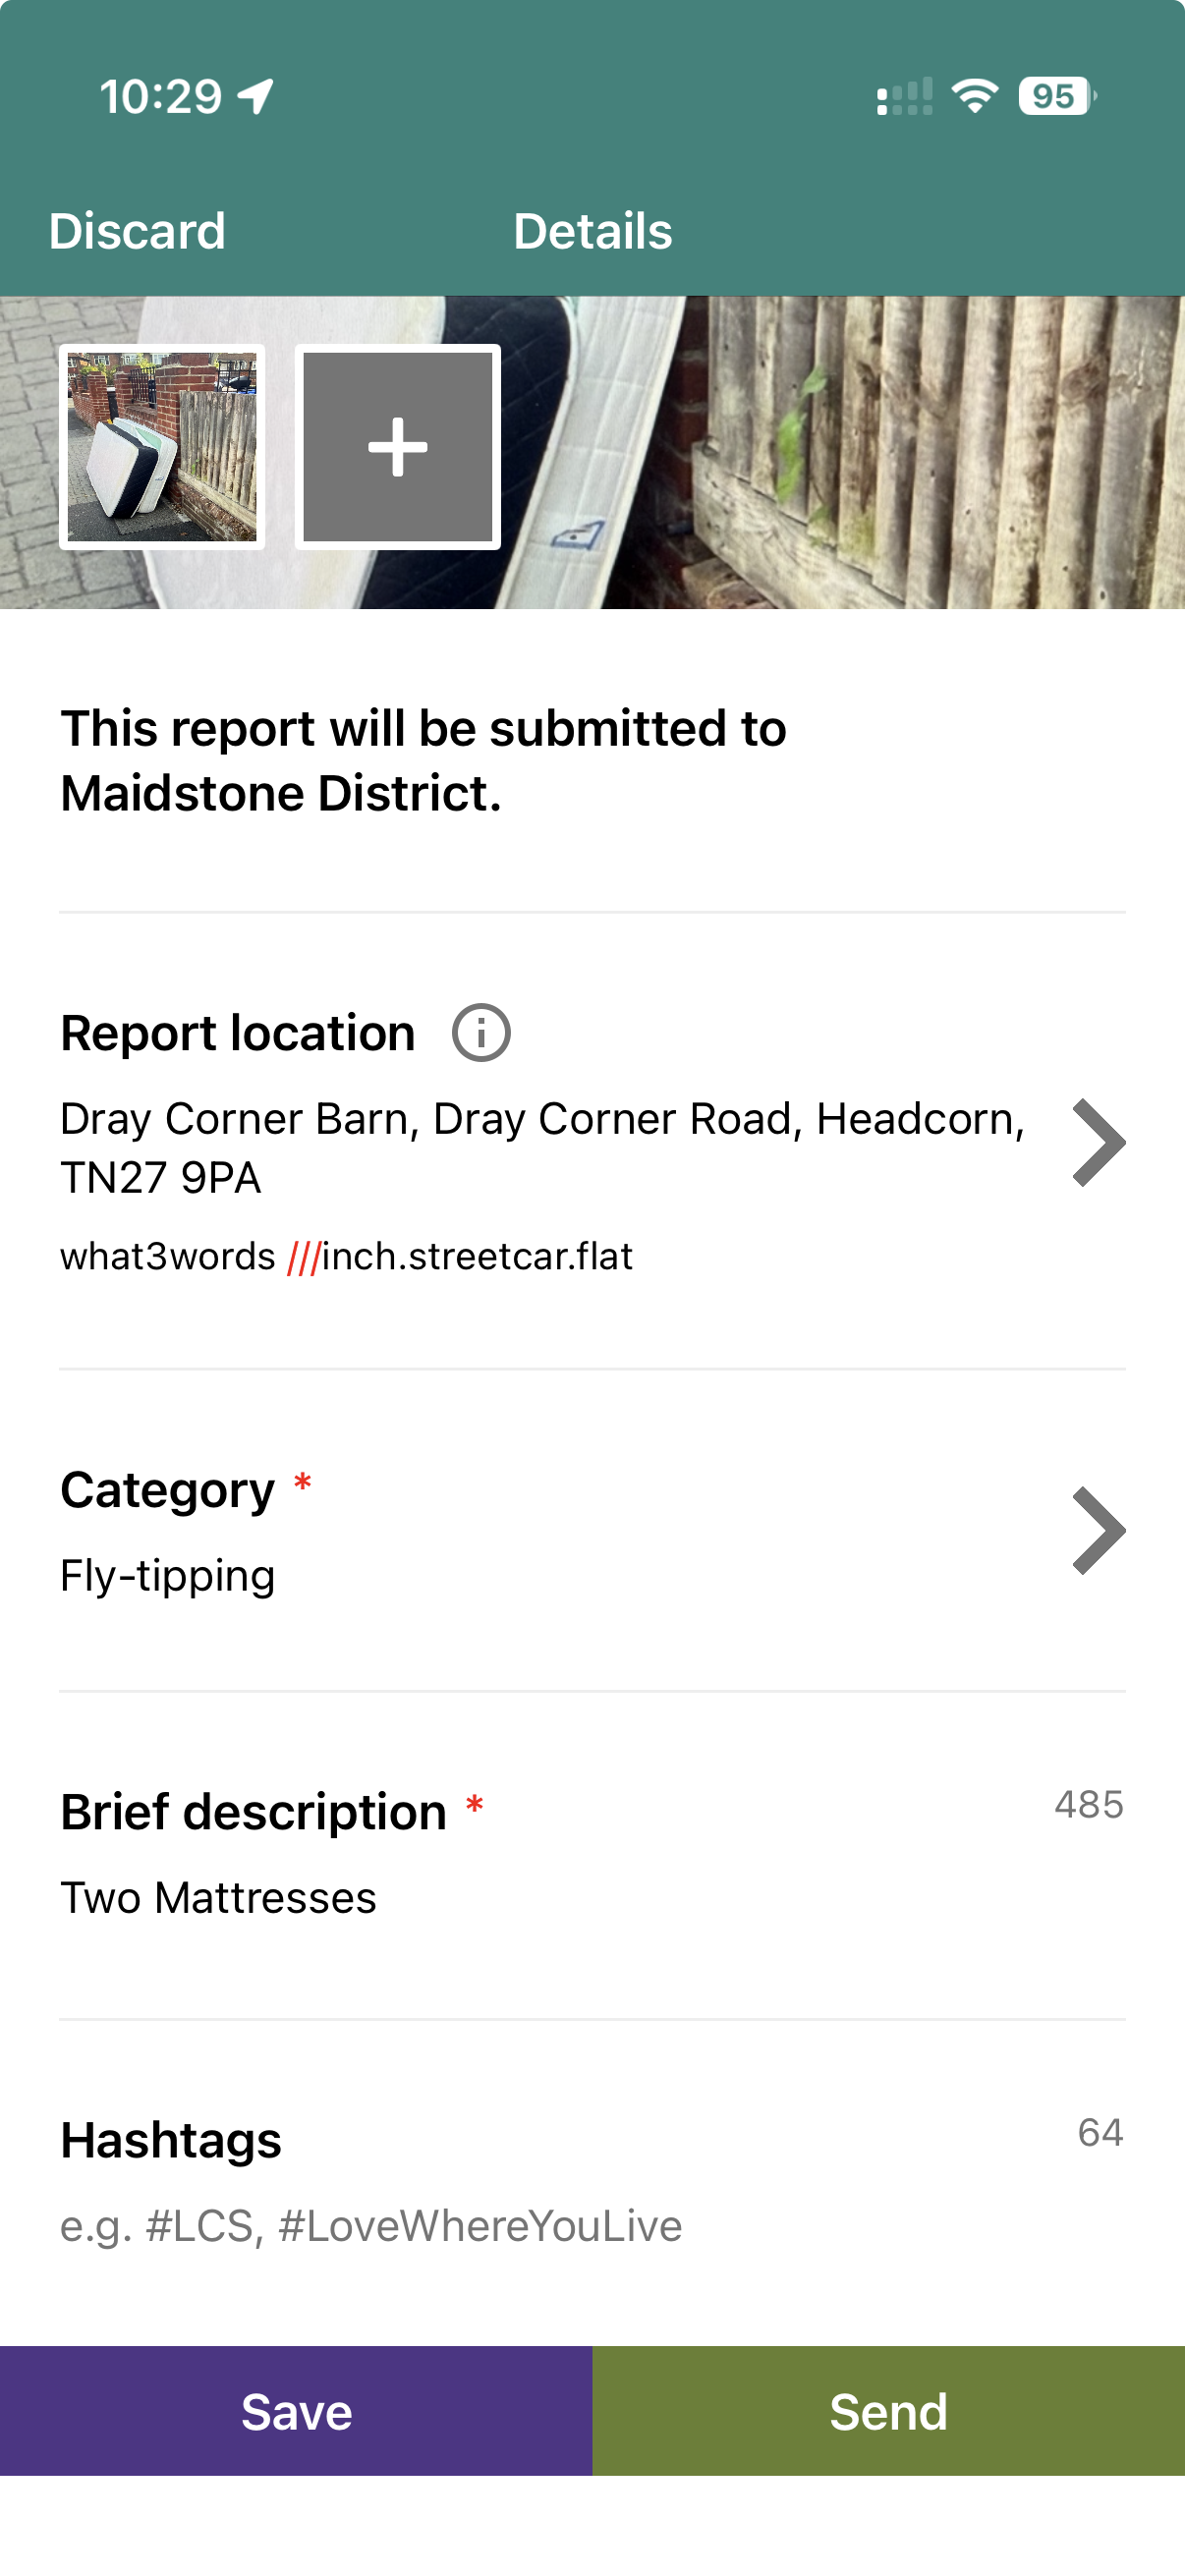
Describe the issue and answer extra questions
Add concise details that help someone find and assess the issue, then answer any extra questions shown for the category you selected. Do not include names, contact details or other personal information in the description or photos.
Describe and answer questionsExtra questions depend on the category selected. Keep personal information out of public descriptions and photos.
5
Check and submit
Check the receiving authority, exact location, category, answers, description and photos. When everything is correct, press Send.
Review and sendCheck every detail before pressing Send.
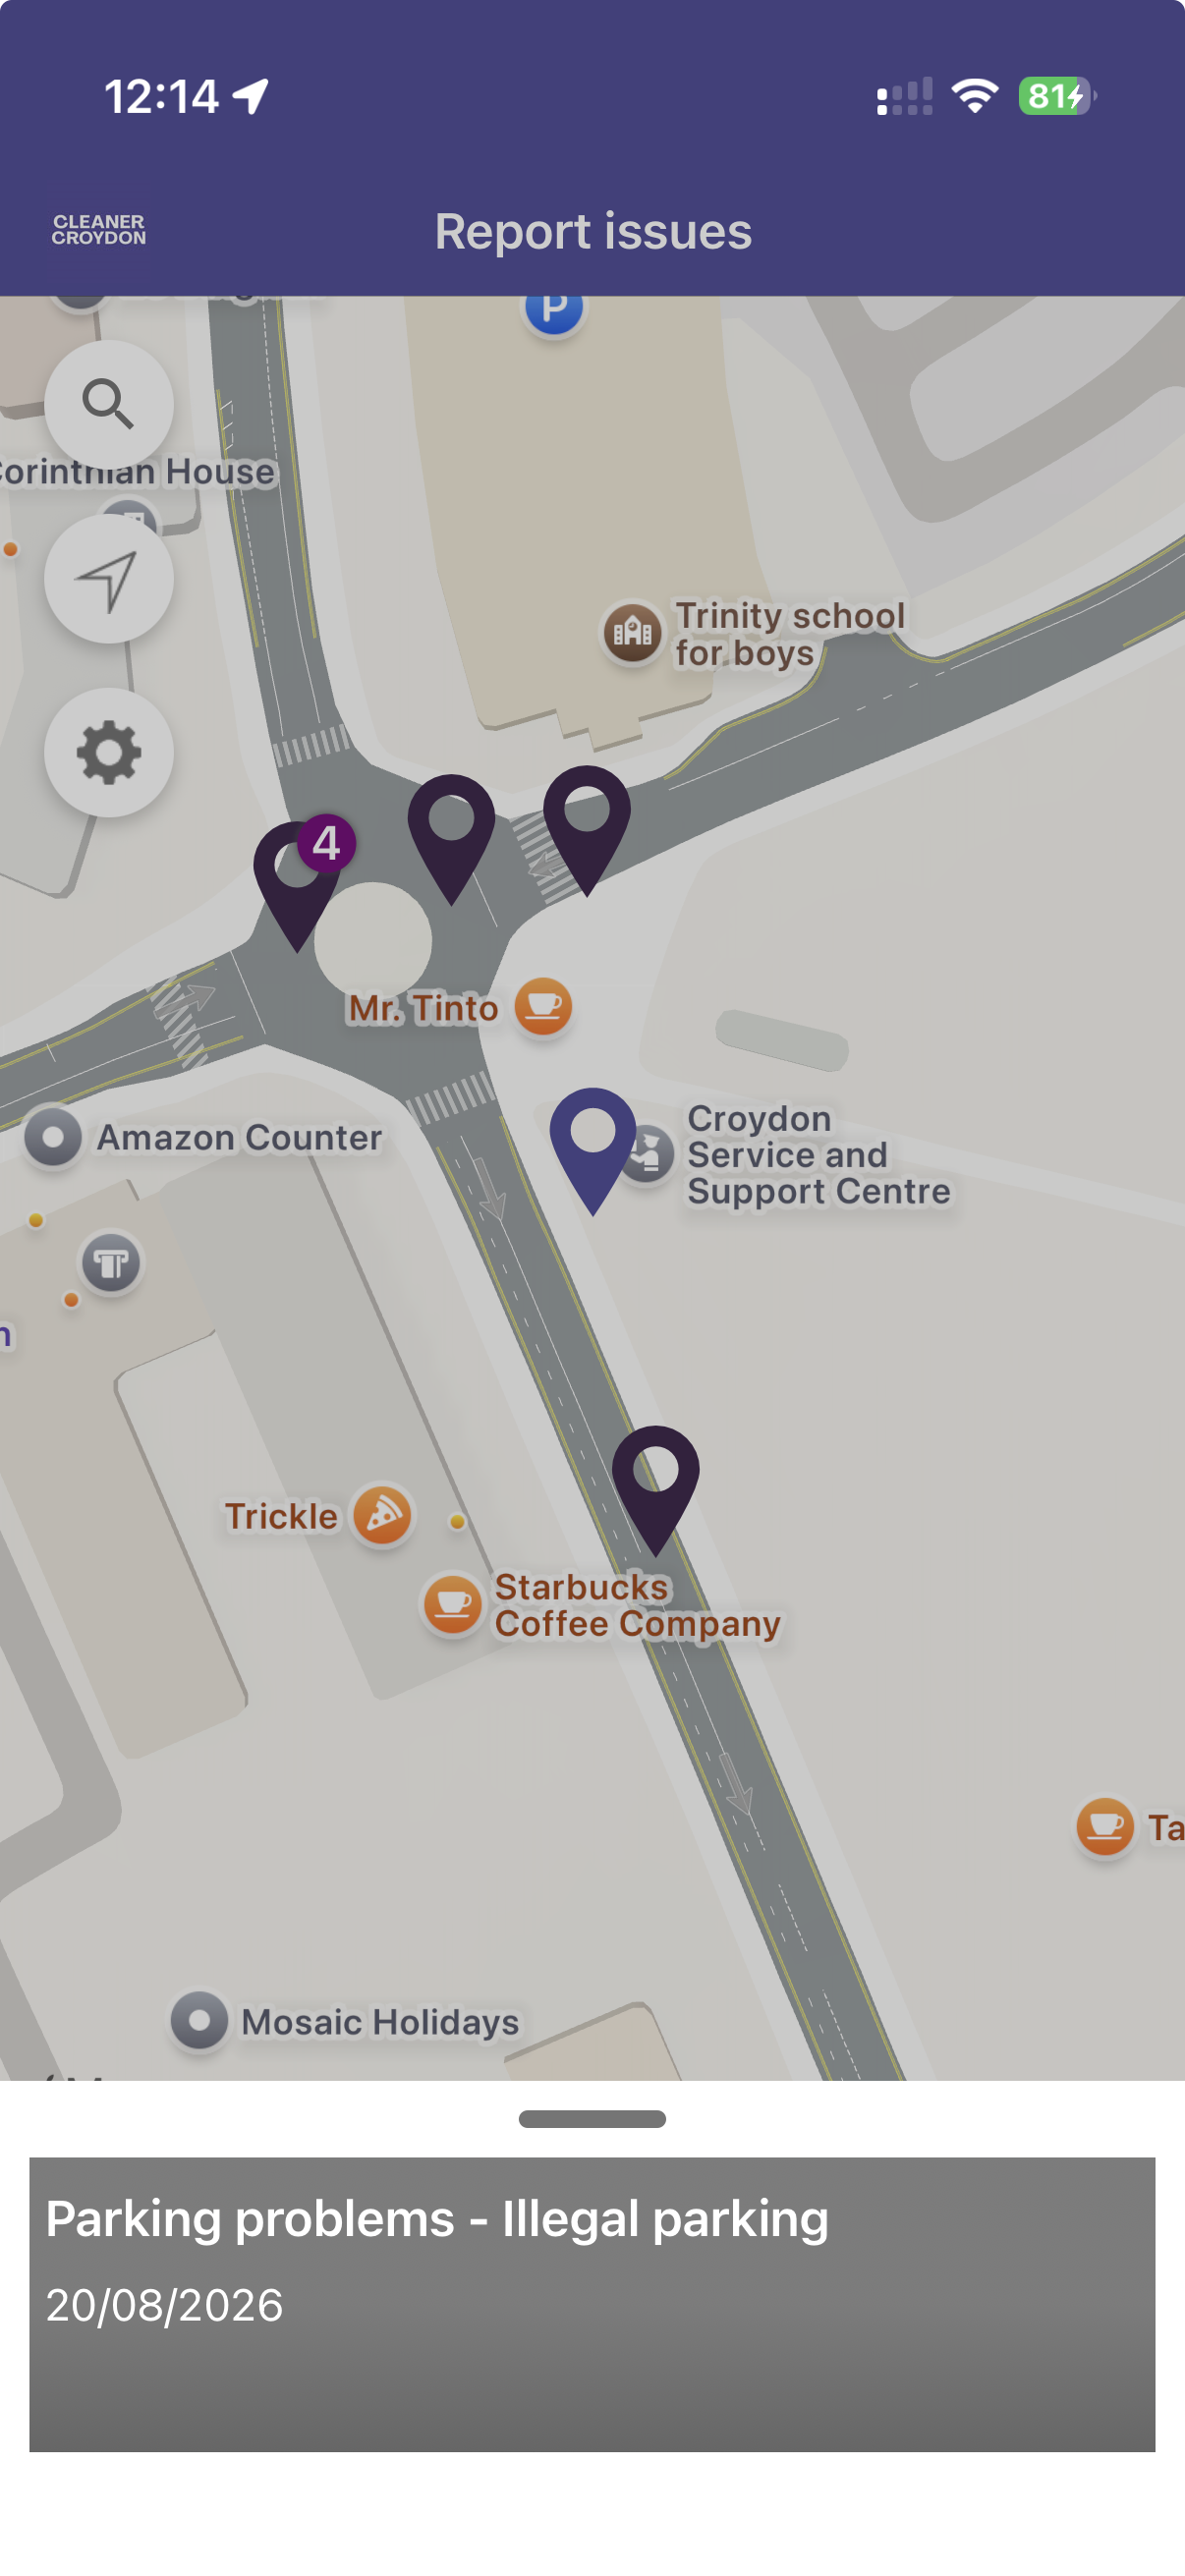
Nearby reports on the app mapColoured pins mark individual reports; a numbered pin groups nearby reports.
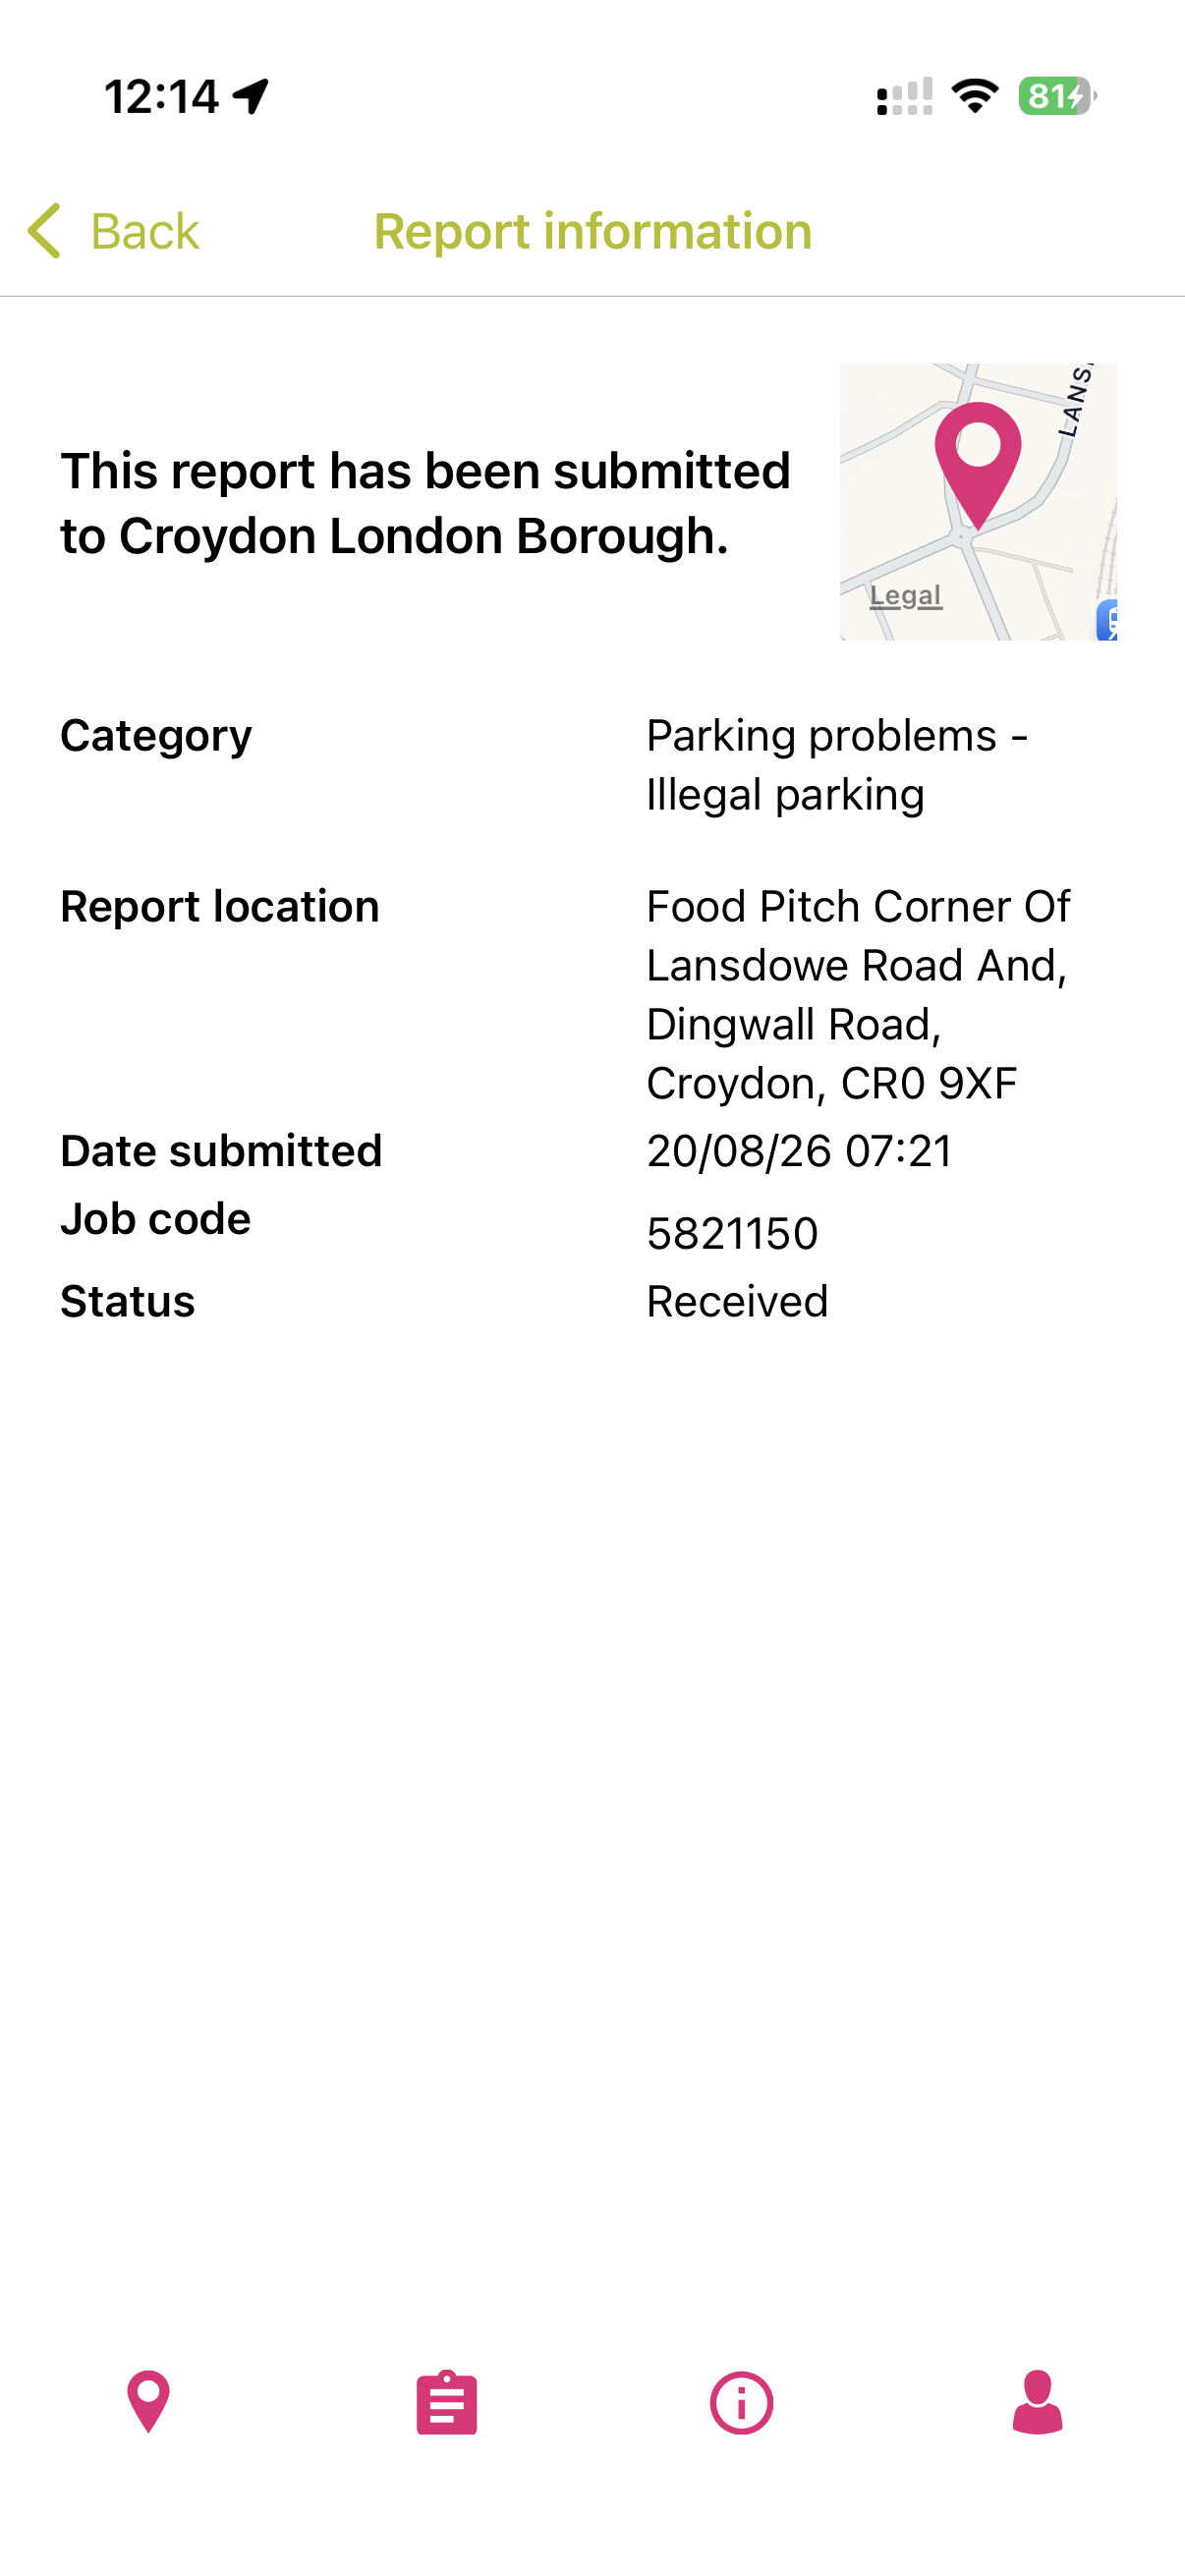
Open report informationTap a nearby pin to see the report details available in the app.
After you press Send
What happens to your report?
Love Clean Streets sends it on
The report is routed using its location and category to the appropriate participating authority or organisation.
The receiving authority takes over
That organisation decides what action to take, carries out any work and controls the report’s progress—not Love Clean Streets.
Follow progress in the app
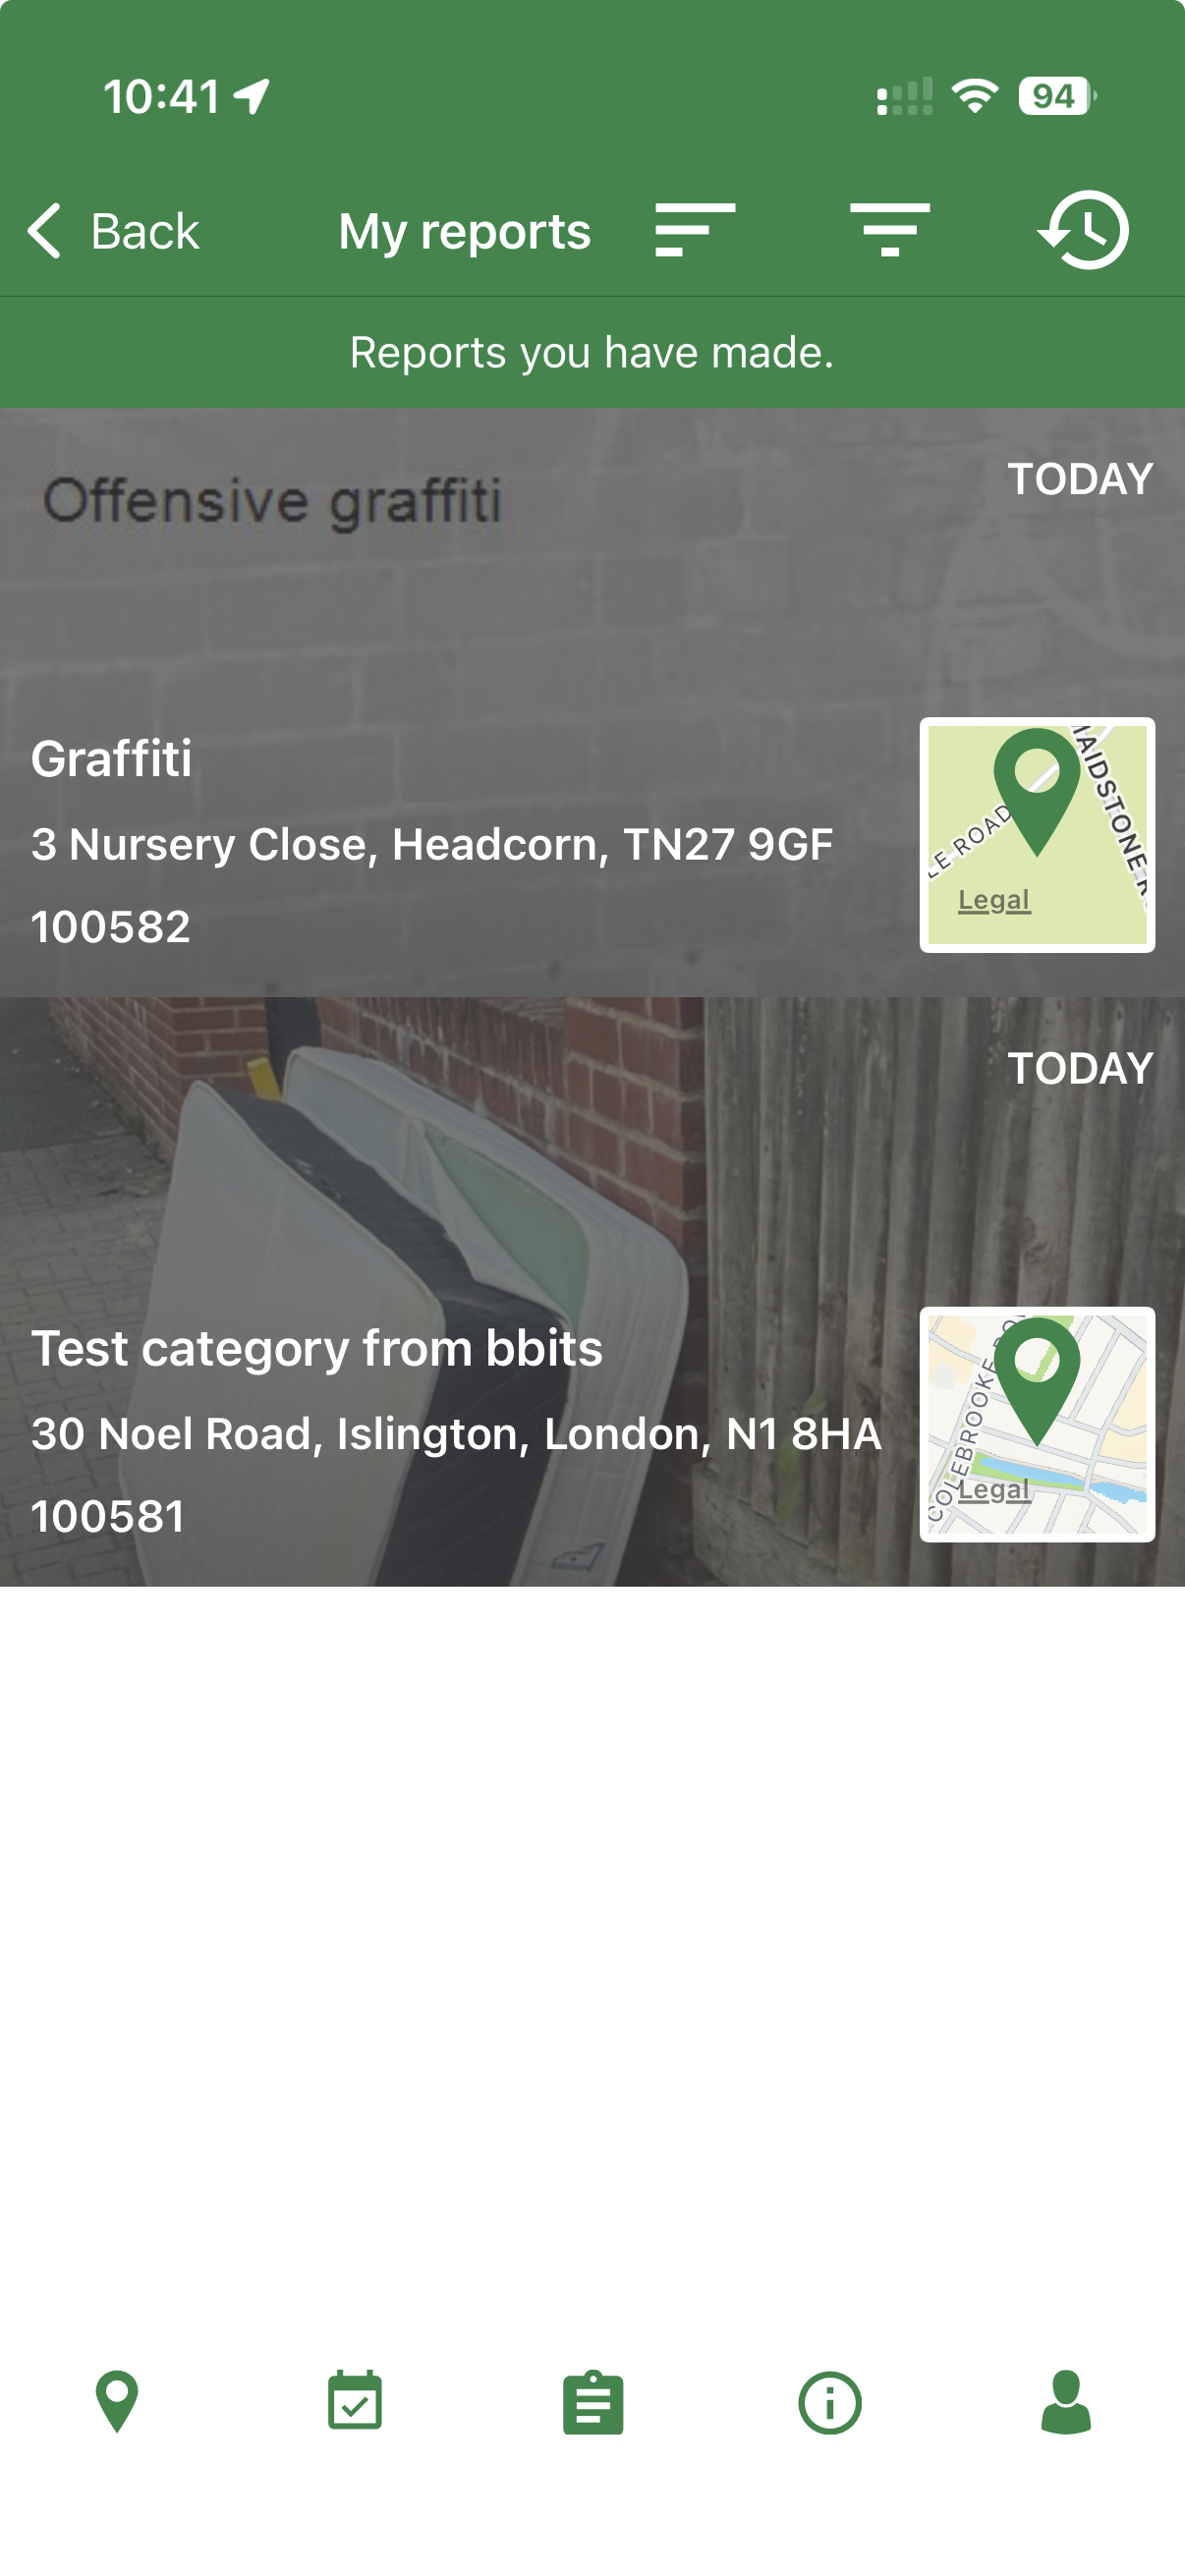
Open My reports to see available status changes. If something has changed, add an update to the original report.
App only
Update a report.
Add an update when you have a clearer or more recent photo, new information that could help the authority, or the situation has changed. Updating the original report keeps everything attached to the same case.
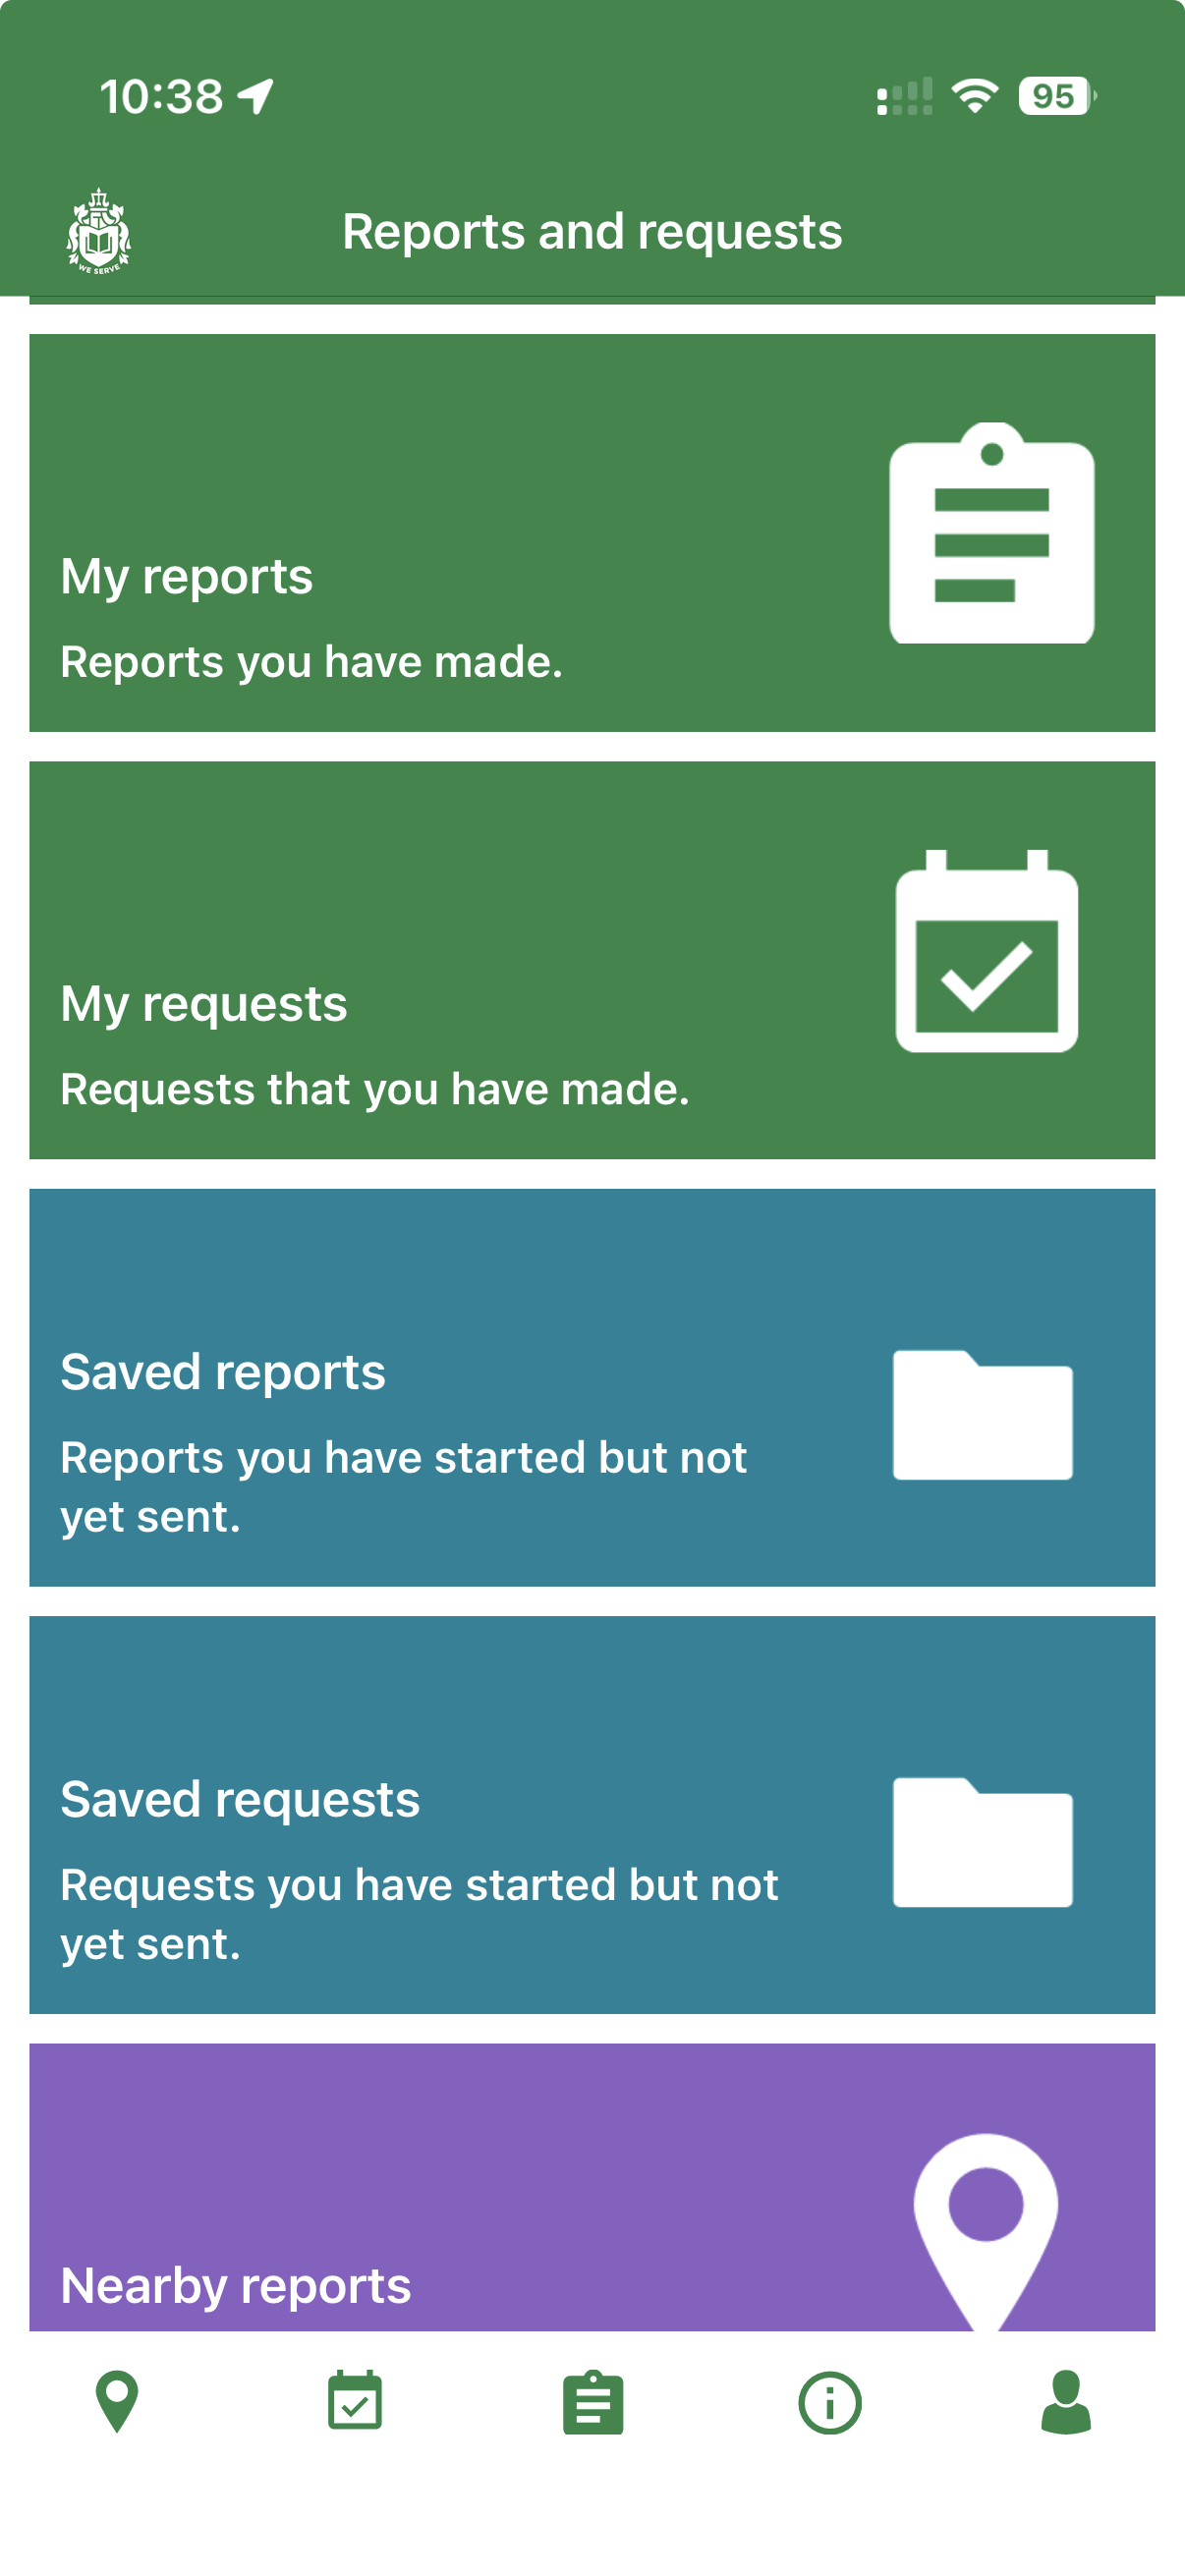
In the bottom navigation, tap the clipboard icon for Reports and requests, then choose My reports.
Select the relevant report from the list.
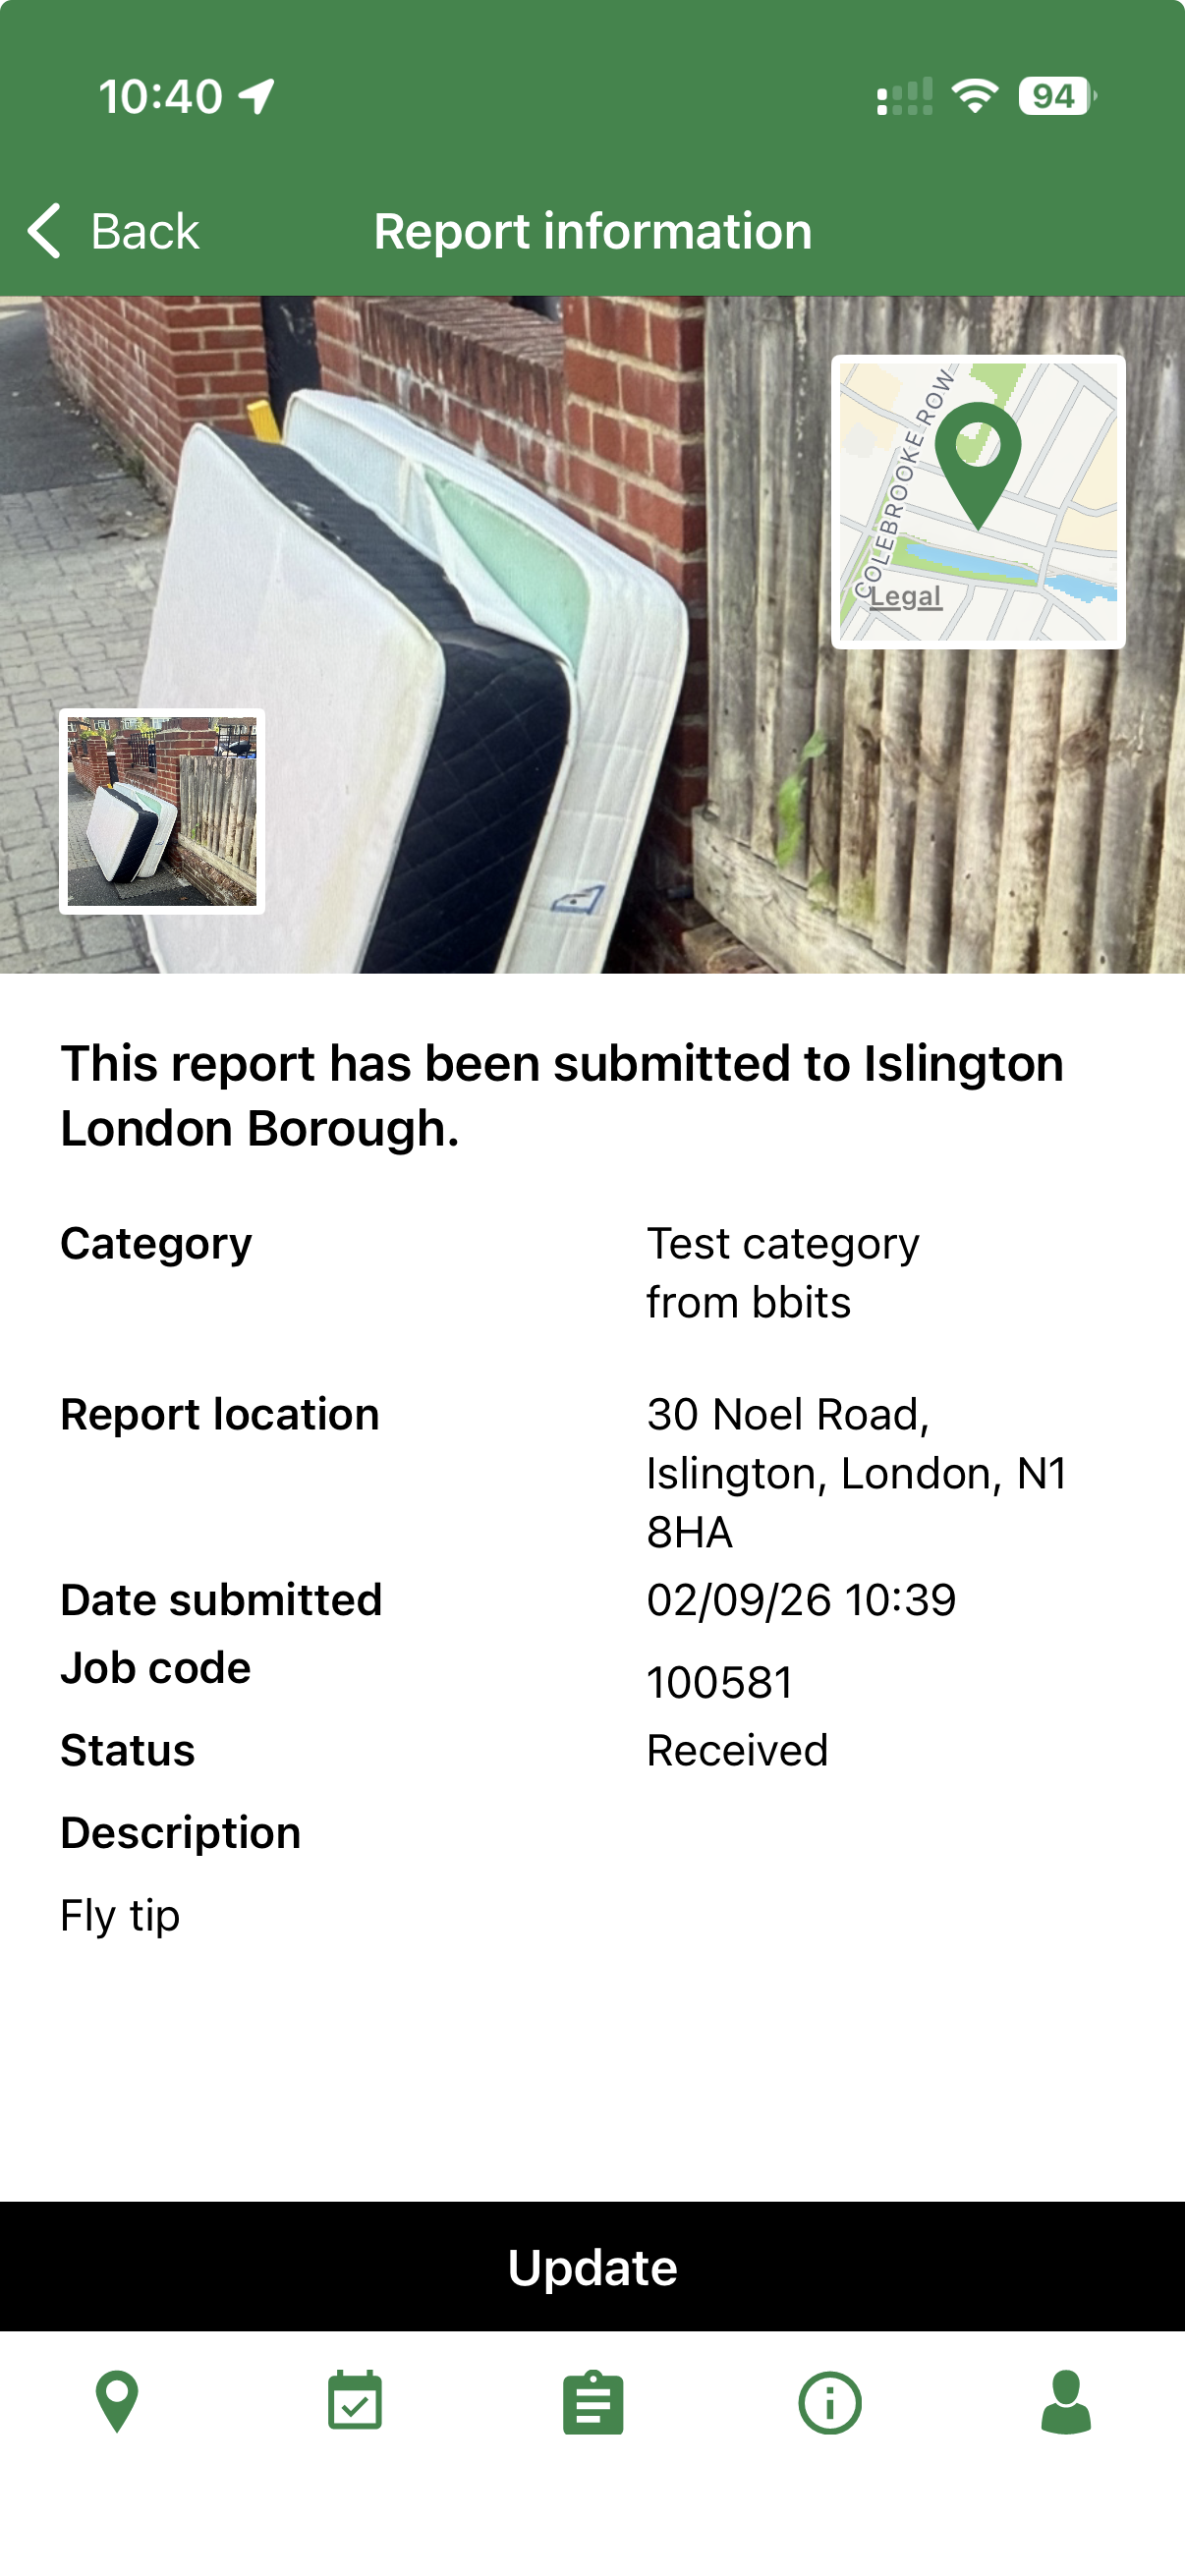
Open the report and choose Update if it is available.
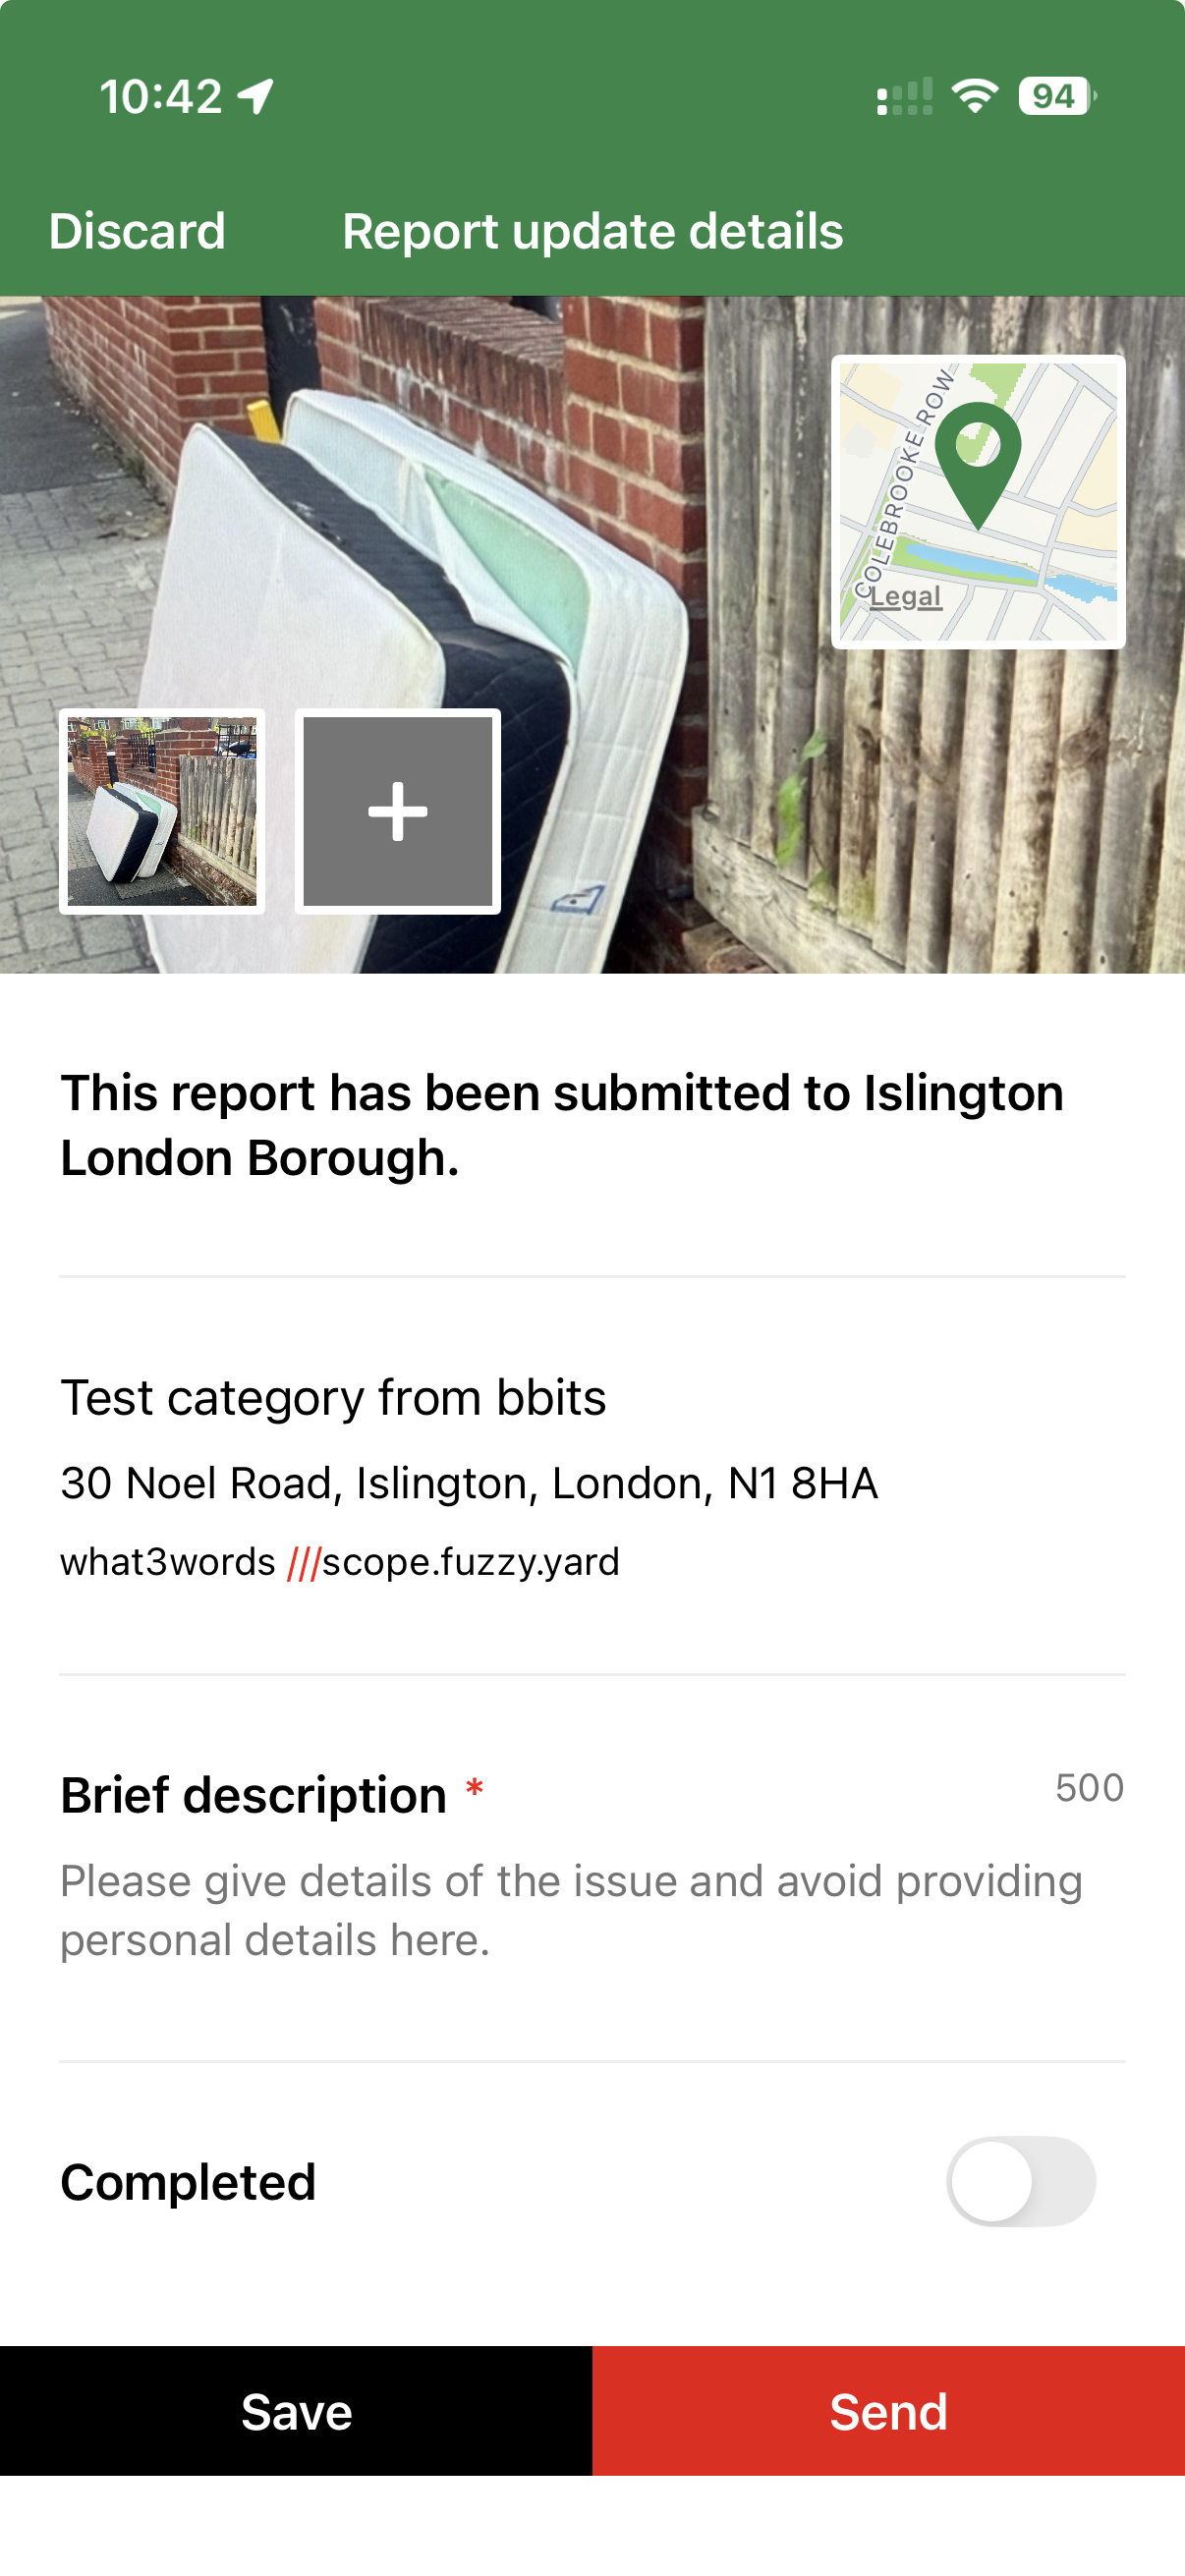
Add the new description or photo, then press Send.
Reports can only be updated in the app. The receiving authority can disable updates, so the option may not appear.
Find My reportsTap the clipboard icon in the bottom navigation, then open My reports.
Select the reportChoose it from your report list.
Choose UpdateThe option only appears when the authority allows updates.
Add the updateEnter new information or a photo and send it.
Use the reporting tools
Do not send a new report or update by email.
Make new reports in the app or on the website. Update existing reports in the app when the receiving authority allows it. Reports and updates emailed to Love Clean Streets are not accepted.